Water Babe
This tutorial is my own
creation and any resemblance to any other tutorial, is purely
coincidental.
Please do not copy and use as your own work.
If you wish to translate please email me
This tutorial is written using P.S.P. 16 but it can also be done in other versions
Animation Shop I will Ref to this as AS
Tube of choice I used Alehandra Vanhek.
You can find her gorgeous work HERE http://www.picsfordesign.com/
I used Sqirlz Water Reflections to make the water move.
BUT once you have used it a few times like every thing else was easy
You can get it here, this is a free program, http://www.xiberpix.net/SqirlzReflect.html,
Scrap kit of choice I used one by SSAM
Font of choice I used Sister-Frisky
Drop Shadow V & H 4 Opacity 40 Bur 5
Please remember to Adjust and Sharpen your Tube if you resize
Remember to save often
Step 1
Open and install the Sqirlz program.
I saved mine to my desk top, made it easier to find.
And to work on, rather then keep searching for it.
Make sure you do not have any other programs open.
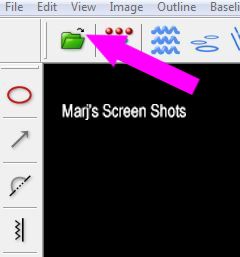
Click on the green folder at left hand of screen see shot 1
Shot 1
Please do not copy and use as your own work.
If you wish to translate please email me
This tutorial is written using P.S.P. 16 but it can also be done in other versions
Animation Shop I will Ref to this as AS
Tube of choice I used Alehandra Vanhek.
You can find her gorgeous work HERE http://www.picsfordesign.com/
I used Sqirlz Water Reflections to make the water move.
BUT once you have used it a few times like every thing else was easy
You can get it here, this is a free program, http://www.xiberpix.net/SqirlzReflect.html,
Scrap kit of choice I used one by SSAM
Font of choice I used Sister-Frisky
Drop Shadow V & H 4 Opacity 40 Bur 5
Please remember to Adjust and Sharpen your Tube if you resize
Remember to save often
Step 1
Open and install the Sqirlz program.
I saved mine to my desk top, made it easier to find.
And to work on, rather then keep searching for it.
Make sure you do not have any other programs open.
Click on the green folder at left hand of screen see shot 1
Shot 1
Open up the beach paper you are going to use.
I used the background that was with my tube as it was water.
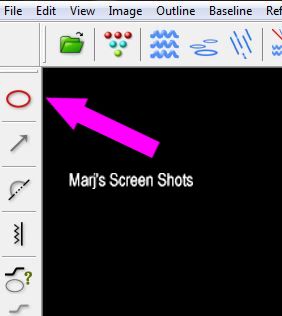
Take your free hand and very carefully go round the part of image you want to use.
Shot 2
I used the background that was with my tube as it was water.
Take your free hand and very carefully go round the part of image you want to use.
Shot 2
See shot 3 to see where I mark my waves, .
NO matter how I tried in Sqirlz, I could not do a scrren shot.
SO I did it in P.S.P.
Shot 3
NO matter how I tried in Sqirlz, I could not do a scrren shot.
SO I did it in P.S.P.
Shot 3

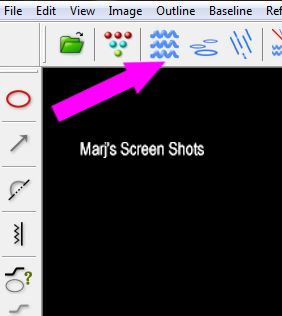
Click
on the wave icon, this is where you customizer your waves.
Shot 4
Shot 4
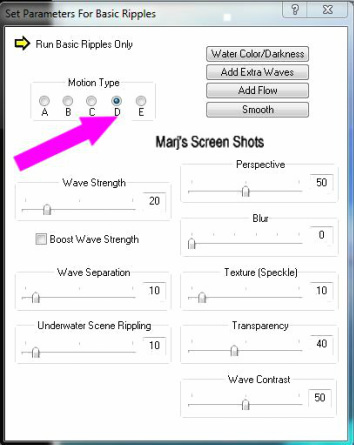
Play
around with the setting I used Basic Ripples only
Click on the little group of waves icon.
This is your customizer for the waves to adjust the size, etc.
At the top of the screen is a small yellow arrow with the word, Run Basic Ripples only
Move your numbers to the ones in shot 5
Shot 5
Click on the little group of waves icon.
This is your customizer for the waves to adjust the size, etc.
At the top of the screen is a small yellow arrow with the word, Run Basic Ripples only
Move your numbers to the ones in shot 5
Shot 5
Play around with the setting I used Basic Ripples only
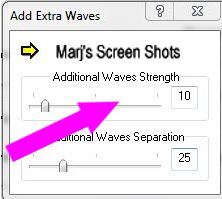
Click on the little group of waves icon.
This is your customizer for the waves to adjust the size, etc.
At the top of the screen is a small yellow arrow with the word, Run Basic Ripples only
Move your numbers to the ones in shot 6
Shot 6
Click on the little group of waves icon.
This is your customizer for the waves to adjust the size, etc.
At the top of the screen is a small yellow arrow with the word, Run Basic Ripples only
Move your numbers to the ones in shot 6
Shot 6

Close it and click on yellow arrow, add flow settings as shot 7
Shot 7
Shot 7
Again this box has the yellow arrow.
Once you are happy with your flow.
Click on the X to close this will take you back to the main wave settings.
Once there, click on the close X in the upper right corner of your, Set Parameters screen.
This will close it. Click on the yellow animate arrow to see your final results.
Step 2
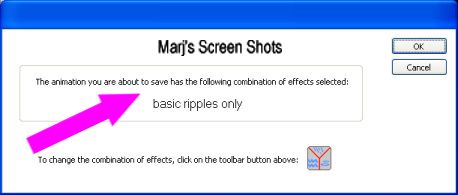
Still working on your image Click anywhere on your image to stop the animation.
Or you can double click on the gif button.
If you click on your image, you will only need to click once on the gif button.
Another screen will open and below is a screen shot of it. Click on ok.
Shot 8
Once you are happy with your flow.
Click on the X to close this will take you back to the main wave settings.
Once there, click on the close X in the upper right corner of your, Set Parameters screen.
This will close it. Click on the yellow animate arrow to see your final results.
Step 2
Still working on your image Click anywhere on your image to stop the animation.
Or you can double click on the gif button.
If you click on your image, you will only need to click once on the gif button.
Another screen will open and below is a screen shot of it. Click on ok.
Shot 8
Next the window will ask where you want to save it.
Write in the name of your image and save it to either your desktop or,
Folder where you can find it .
Once you have saved it a window in the following screen shot will appear.
Once again a window will open up see below
Shot 9
Write in the name of your image and save it to either your desktop or,
Folder where you can find it .
Once you have saved it a window in the following screen shot will appear.
Once again a window will open up see below
Shot 9
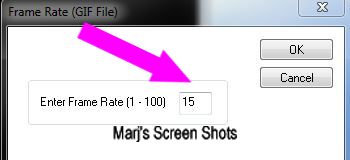
Then this window below will open up
Shot 10
Shot 10
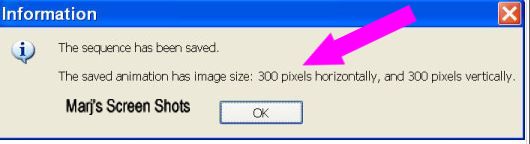
Then the window below
Shot 11
Shot 11
Step
3
Now you can close out your image in Sqirlz, and close Sqirlz.
Open A.S. then open up your saved G.I.F in A.S.
You will see that it has 20 frames - yes, this is a lot,
and you might be able to cut down the number of frames,
but your animation won't look the same, or as smooth.
Open P.S.P.
Click on frame one
Copy frame one and take over to P.SP.
Paste as a new image.
Name this background.
Step 4
Copy and paste your tube place where you like.
Give it a drop shadow.
Copy and paste any elements.
Again place where you feel happy with them.
Resize if necessary, I had a Sun in my Preset tools.
I placed this behind the clouds
Give them a drop shadow.
Step 5
New layer fill with a colour that goes with your tube.
I used #bbbead, Select all.
Modify, by 6 hit delete, Select none.
Give this the same drop shadow.
Add your Artist copyright and your name.
Again give your name a drop shadow.
Step 6
You can delete the background layer.
This was just so you could place your tube and Elements.
Copy merged and take over to A.S.
Paste as a new image.
Make the same number of frames, that your Animation has.
It should be 20 frames.
Step 7
Working on the water animation.
Edit Select all, Propagate Paste.
Do the same with the image you,
have just made 20 frames.
VEREY carefully Paste your new image on to the water Animation.
See my tag for ref:.
If happy save as a G.I.F
Hope you enjoy my tutorial.
Any problems please feel free to email me at [email protected]
Please remember this is just a guide.
I would love to see any work you have made using my tutorials
And with your permission show them on my site
Marj
Written 30th September 2014
