PSP Addict
This tutorial is my own creation and any resemblence to any other tutorial, is purely conicidental.
Please do not copy or use as your own work
This tutorial is written using PSP 9 but it can also be done in other versions.
What we will need for this tutorial:-
Paint Shop Pro (PSP) and Animation Shop
Filters Unlimited Special Effects 1
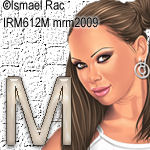
Tube of choice- I used the work of Ismael Rac, you can get his work here http://xeracx.net/store/
Font of choice you need a bold one, I used Androgyne
Remember to save as you go along
Lets get started
Step 1
Open a new image 600 x 250
Make a gradient using two colours from your tube Angle 0 Repeats 2 invert ticked fill you image.
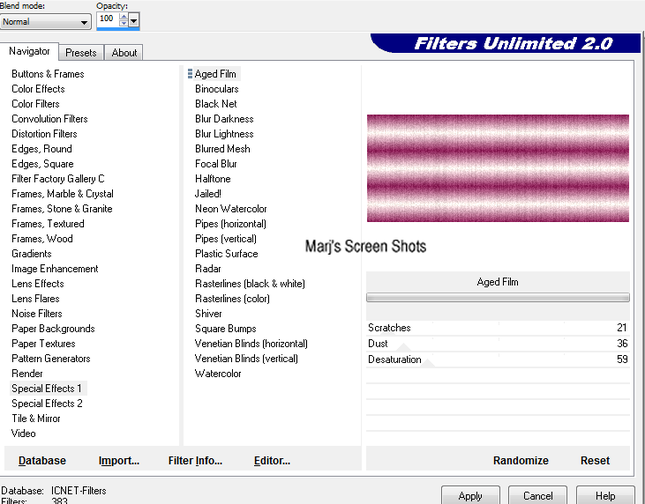
Apply Filters Unlimited Special Effects 1 aged film shot 1,
Effect Edge Enhance, I also did dissove but leave this up to you, rename this Background.
Please do not copy or use as your own work
This tutorial is written using PSP 9 but it can also be done in other versions.
What we will need for this tutorial:-
Paint Shop Pro (PSP) and Animation Shop
Filters Unlimited Special Effects 1
Tube of choice- I used the work of Ismael Rac, you can get his work here http://xeracx.net/store/
Font of choice you need a bold one, I used Androgyne
Remember to save as you go along
Lets get started
Step 1
Open a new image 600 x 250
Make a gradient using two colours from your tube Angle 0 Repeats 2 invert ticked fill you image.
Apply Filters Unlimited Special Effects 1 aged film shot 1,
Effect Edge Enhance, I also did dissove but leave this up to you, rename this Background.
Step 2
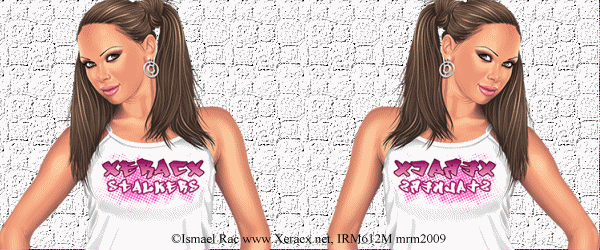
We now need to create our saying, or name make your font BIG I did it at 100 as my name is smal.
Apply Objects aline center of canvas convert to raster layer, do the same with other words you use,
if any of your words seem to big DO not resize as it wil not look right,
name these layers what your words are IE: mine was Marj, a PSP, Addict.
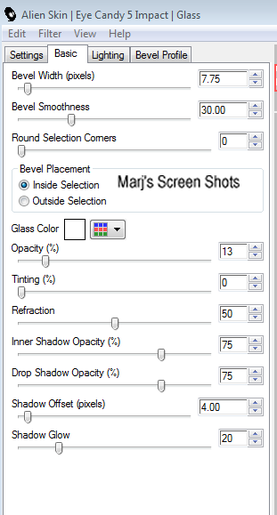
Now you can do as I did and apply Eye Candy 5 Impact Glass basic shot 2, or bright noise etc.
We now need to create our saying, or name make your font BIG I did it at 100 as my name is smal.
Apply Objects aline center of canvas convert to raster layer, do the same with other words you use,
if any of your words seem to big DO not resize as it wil not look right,
name these layers what your words are IE: mine was Marj, a PSP, Addict.
Now you can do as I did and apply Eye Candy 5 Impact Glass basic shot 2, or bright noise etc.
Step 3
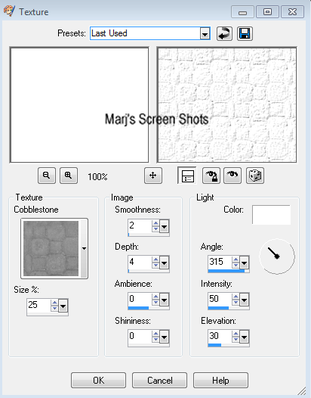
New Raster layer fill with white, apply a texture, I did Cobbleston, shot 3,
Apply Edge Effects, enhance, copy and paste your tube, and move to the left duplicate mirror, crop your tag, mege down duplicate.
Move the duplicate down to above your backgroud layer apply Luminance (L) to your tube,
Now merge this with your background layer.
Step 4
Go back up to the original tube layer and merge this down to your white layer.
Add your copywrite, name this white layer, close all layers apart from your white layer
If you want to make a AV shift and D and put to one side I just used part of the tubes face
Step 5
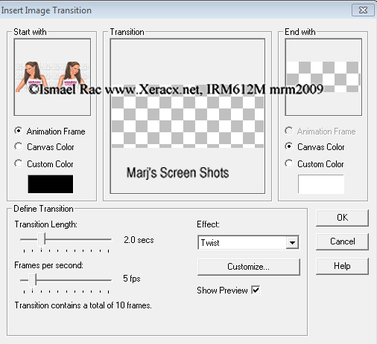
Open up AS and copy and take your white layer over to it, and insert image tranistion shot 4,
Go back up to the original tube layer and merge this down to your white layer.
Add your copywrite, name this white layer, close all layers apart from your white layer
If you want to make a AV shift and D and put to one side I just used part of the tubes face
Step 5
Open up AS and copy and take your white layer over to it, and insert image tranistion shot 4,
This will give you 11 frames, make two copies of this by Edit and copy and paste as new image do this twice.
Back to PSP and open up your background, and your bottom name, mine was Addict, copy and take to AS make 11 frames,
I did edit and duplicate till I had 11 frames
Step 6
On this back ground layer do Select all and Propagate Paste, making sure you are on frame one,
go to one of your animation's you made of your white layer and do the same now take the white layer
and put into your background layer.
MAKE sure you do not have any of the background showing, on the first frame,
view to make sure you have it right, back to PSP close the bottom name and open up the next one take to AS
And make 11 frames again. and do the same as above now do the same with your last name.
YOU should have the amount of animations as your name in my case three
Step 7
Have the bottom name animation open, making sure you are on frame one, open up your middle name,
select all, propagate paste and copy,
take this to your bottom name animation and paste BEFORE current layer, do the same with your top layer.
Step 8
On frame one and change frame properties to 40 do the same with frame 21, view leave the rest of the frames at 10,
when happy.save as GIF, you can leave it as it is or put a border round it
Hope you enjoy my tut
Marj
This was written on 5th April 2012
