Angel or Devil

This tutorial is my own creation and any resemblance to any other tutorial, is purely coincidental.
Please do not copy as use as your own work
Please do not translate if you wish to email me
This tutorial is written using PSP 9 but it can also be done in other versions
Animation Shop I will ref to this as AS
Filters used Eye Candy 5 Nature Smoke
Font A Lolita Scorned
Tube of choice I am using Popeye Wong
You can get his work here http://www.popeyewong.com
A template no 69 by Spawn here http://spawnsfstemplates.blogspot.co.uk/ ,
please leave some love
Thanks Dave for sharing
Lets get started
Step 1
Open Template, Duplicate ,Close Original,,Delete the Credits layer
Active your main background layer Select, all Float, Defloat,
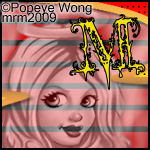
New raster layer and fill with a colour from your tube, is you are using same as me its #e90101,
select none, delete your main background layer, keep this layer active and paste your tube you want just her face,
resize if it needs it, crop while your on this layer, adjust, Hue and Saturation both at 0 lower opacity to 70,
or what you feel looks best, name this Tube 1 duplicate came this Tube 2,
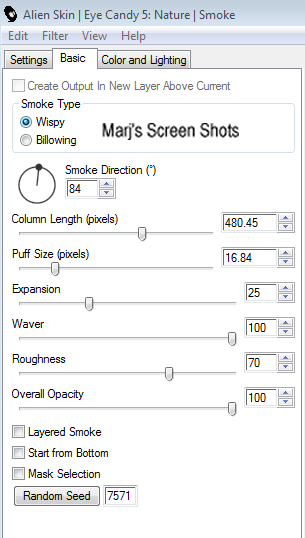
working on tube 1 layer, apply Eye Candy 5 Nature Smoke, factory default settings,
See shot 1
active Tube layer 3 and this time hit the random button, close this layer for now
See shot 1
Please do not copy as use as your own work
Please do not translate if you wish to email me
This tutorial is written using PSP 9 but it can also be done in other versions
Animation Shop I will ref to this as AS
Filters used Eye Candy 5 Nature Smoke
Font A Lolita Scorned
Tube of choice I am using Popeye Wong
You can get his work here http://www.popeyewong.com
A template no 69 by Spawn here http://spawnsfstemplates.blogspot.co.uk/ ,
please leave some love
Thanks Dave for sharing
Lets get started
Step 1
Open Template, Duplicate ,Close Original,,Delete the Credits layer
Active your main background layer Select, all Float, Defloat,
New raster layer and fill with a colour from your tube, is you are using same as me its #e90101,
select none, delete your main background layer, keep this layer active and paste your tube you want just her face,
resize if it needs it, crop while your on this layer, adjust, Hue and Saturation both at 0 lower opacity to 70,
or what you feel looks best, name this Tube 1 duplicate came this Tube 2,
working on tube 1 layer, apply Eye Candy 5 Nature Smoke, factory default settings,
See shot 1
active Tube layer 3 and this time hit the random button, close this layer for now
See shot 1
Step 2
Active the bottom right twirl Select, all Float, Defloat,
New raster layer, and fill with a gold Gradient I had one in my PSP, select none,
delete the bottom right twirl, repeat this step with the top right twirl,
Give both layers a drop shadow.
Step 3
Active the bottom dark twirl, Select, all Float, Defloat,
New raster layer and fill with a gradient, I using the back ground colour, and the colour from her halo,
Delete the bottom twirl layer repeat with the Top dark twirl
BUT change the gradient so the light colour is matching the bottom see my tag for ref:
Step 4
Add your tube again and give it a drop shadow I used V & H 4 Opacity 50 Blur 5,
Do Shift and D to make a image to use for you AV, add your copyright and name
Step 5
Open up AS
Copy merged and take to AS paste as new animation,
Back to PSP close of the tube layer 1 and open up tube layer 2,
Copy merger and take to AS and paste after current animation,
Edit select all, frame properties , and set these to 50
Step 6
Open up the image you set to one side and crop 150 x 150 the piece of tag you want to use as a AV
Remember if you use any part of your tube to add your copyright
Hope you enjoyed my tutorial, any questions you can email me at [email protected]
Marj
Written 18th September 2012
