Sparkle
This tutorial is my own creation and any resemblance to any other tutorial, is purely coincidental.
Please do not copy and use as your own work.
If you wish to translate please email me
It’s assumed that you have working knowledge on how to use filters/plugins.
This tutorial is written using PSP 16 but it can also be done in other versions
Animation Shop I will Ref to this as AS
Filter Penta.Com
Filter VM Toolb box
Filter AAA Foto
Filter Alienskin Xenofex 2
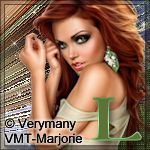
Tube of choice- I used Very Many
You can get their work here http://verymanytubes.com/
Font of choice I used Yataghan size 16
Please remember to Adjust and Sharpen your Tube if you resize
Remember to save often
Step 1
Open a new image, 600 x 300. Flood fill your working image with a colour from your tube.
I am using #5d7236, apply Penta.com Dots and Cross 72 - 10 – 2.
Copy your close up tube. paste as a new layer.
Apply VM Toolbox Zoom blur settings 72 – 23. Apply Effects Edge effects Enhance more.
Name this layer sparkle 1.
Duplicate layer, rename to sparkle 2.
Duplicate layer, rename to sparkle 3
Close sparkles layers 2 and 3 off for now
Step 2
Copy your tube. paste as a new layer.
Position to your liking on the left hand side.
Duplicate and working on the original
Apply AAA Foto I did Width 4, Opacity 50 and left the rest as they were.
** back to the duplicate apply a drop shadow I used V & H 3
Step 3
Copy your tube and paste as a new layer, you will need to re-size it see my tage for Ref:.
And place on the right hand side, give it the same drop shadow as before.
crop your image at this stage.
Add Artist copyright, and your name, give your name a drop shadow
Shift D this is for your AV, put this to one side for now
Step 4
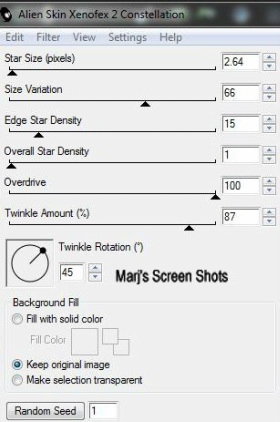
Active your Sparkle layer 1, and apply Alienskin Xenofex 2 Constellation, settings as shot 1.
Make sure the Sparkle layers 2 and 3 are closed and Merge visible and apply AAA Foto.
With the same settings you used on Tube **, take over to AS, and paste as a new image.
Shot 1
Please do not copy and use as your own work.
If you wish to translate please email me
It’s assumed that you have working knowledge on how to use filters/plugins.
This tutorial is written using PSP 16 but it can also be done in other versions
Animation Shop I will Ref to this as AS
Filter Penta.Com
Filter VM Toolb box
Filter AAA Foto
Filter Alienskin Xenofex 2
Tube of choice- I used Very Many
You can get their work here http://verymanytubes.com/
Font of choice I used Yataghan size 16
Please remember to Adjust and Sharpen your Tube if you resize
Remember to save often
Step 1
Open a new image, 600 x 300. Flood fill your working image with a colour from your tube.
I am using #5d7236, apply Penta.com Dots and Cross 72 - 10 – 2.
Copy your close up tube. paste as a new layer.
Apply VM Toolbox Zoom blur settings 72 – 23. Apply Effects Edge effects Enhance more.
Name this layer sparkle 1.
Duplicate layer, rename to sparkle 2.
Duplicate layer, rename to sparkle 3
Close sparkles layers 2 and 3 off for now
Step 2
Copy your tube. paste as a new layer.
Position to your liking on the left hand side.
Duplicate and working on the original
Apply AAA Foto I did Width 4, Opacity 50 and left the rest as they were.
** back to the duplicate apply a drop shadow I used V & H 3
Step 3
Copy your tube and paste as a new layer, you will need to re-size it see my tage for Ref:.
And place on the right hand side, give it the same drop shadow as before.
crop your image at this stage.
Add Artist copyright, and your name, give your name a drop shadow
Shift D this is for your AV, put this to one side for now
Step 4
Active your Sparkle layer 1, and apply Alienskin Xenofex 2 Constellation, settings as shot 1.
Make sure the Sparkle layers 2 and 3 are closed and Merge visible and apply AAA Foto.
With the same settings you used on Tube **, take over to AS, and paste as a new image.
Shot 1
Step 5
Back in P.S.P and undo the Merge visible and AAA Foto. Close off sparkle layer 1.
And activate the sparkle 2 layer. And apply Constellation same settings but hit the random button once.
Merge visible and apply AAA Foto, merge visible, and take over to AS and paste after current frame.
Step 6
Back to P.S.P, and undo the Merge visible and AAA Foto.Close off sparkle layer 2.
And activate the sparkle 3 layer. and apply Constellation same settings but hit the random button once.
Apply AAA Foto, merge visible, and take over to AS and paste after current frame.
I set the frame at 20 but will leave this up to you.
Step 7
Active the image you put to one side for your AV and crop the part you want to use.
I did not animated the AV merge visible and apply Foto frame with the same setting you have used before,
but if you want animate this, repeat steps 4, 5 and 6
Hope you enjoy my tutorial.
Any problems please feel free to email me at [email protected]
Please remember this is just a guide.
I would love to see any work you have made using my tutorials
And with your permission show them on my site
Marj
Written 4th June 2014
