TexasBarbie
This tutorial is my own creation and any resemblance to any other tutorial, is purely coincidental.
Please do not copy as use as your own work,
and please do not translate, with out my permission
This tutorial is written using PSP 9 but it can also be done in other versions
Animation Shop I will use AS for this
Filter Eye Candy 5 Textures
Tube of choice- I used a close up and full tube,
I am using the great work of Gina King please do not use unless you have a licence
you can get her great work here http://psptubesemporium.com/index.php?p=home
Drop Shadow I used was H & V 3 Opacity 62 Blur 10
Font of choice I used Wild West Wind
Gradient made with two colours from you tube
Lets begin
Remember to save often
Step 1.
Open a image 600 x 400 fill with a gradient made from your back ground colour and a lighter one
Liner, Angle and Repeats 0, name this background duplicate three times naming them
Twist 1, 2, and 3 working on Twist 1, apply Eye Candy 5 Textures Random Large no
Twist Long Streaks apply again to twist 2 and 3 hitting the random button each
time, close off twist 2 and 3 for now
Step 2
New raster layer, find your star in your perset tools mine was Star 2
draw a star about the size of mine see my tag for ref,
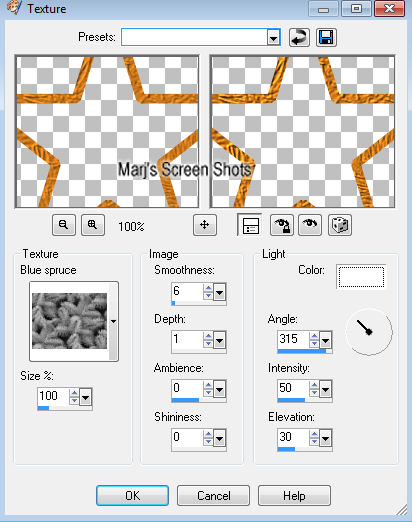
Objects, Align, centre of canvas, effects texture Blue spruce as shot 2,
Please do not copy as use as your own work,
and please do not translate, with out my permission
This tutorial is written using PSP 9 but it can also be done in other versions
Animation Shop I will use AS for this
Filter Eye Candy 5 Textures
Tube of choice- I used a close up and full tube,
I am using the great work of Gina King please do not use unless you have a licence
you can get her great work here http://psptubesemporium.com/index.php?p=home
Drop Shadow I used was H & V 3 Opacity 62 Blur 10
Font of choice I used Wild West Wind
Gradient made with two colours from you tube
Lets begin
Remember to save often
Step 1.
Open a image 600 x 400 fill with a gradient made from your back ground colour and a lighter one
Liner, Angle and Repeats 0, name this background duplicate three times naming them
Twist 1, 2, and 3 working on Twist 1, apply Eye Candy 5 Textures Random Large no
Twist Long Streaks apply again to twist 2 and 3 hitting the random button each
time, close off twist 2 and 3 for now
Step 2
New raster layer, find your star in your perset tools mine was Star 2
draw a star about the size of mine see my tag for ref,
Objects, Align, centre of canvas, effects texture Blue spruce as shot 2,
Name this star, still working on the star layer take your magic wand and click in centre of the star,
Select, Modify, Expand by 2, copy and paste your close up resize if it needs it,
working on your star layer, invert now active your tube layer and hit
delete, deselect, working on the tube apply screen, move the tube below the
star, give the star a drop shadow. Merge down, duplicate, Image resize by 80
then resize again, move to right hand bottom corner, duplicate and move one to
left hand top corner.
Step 3
Copy and paste your full tube and position where you wish,
if you use same one as me see my tag for ref,
I made her look as if she was sitting on the bottom star,
At this stage make two more images by doing Shift and D,
put these to one side for now.
Step 4
New raster layer
Fill with the colour you used for your star, Select all, Modify Contact by 6 hit
delete and deselect, give it the same texture you used for your star and a drop
shadow, repeat but do -3 oh H and V,
Step 5
Add copyright and name
Step 6
Open up AS, with 2 and 3 Twist layers closed copy merge and take to AS
and paste as new animation, back to PSP close Twist 1 and open Twist two,copy merge,
take to AS and paste after current image,
back to PSP and do the same with Twist 3, view and if happy save I did the
frames properties at 30,
Step 7
Open up one of the
images you put to one side, take your section tool and make a section see shot 2
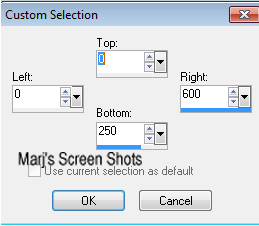
Image Crop to image, repeat steps 4, 5, and 6.
For your AV chose the part you would like and crop it by 150 x 150
Please remember to
add your copyright to your forum tag and AV
Hope you enjoyed my tut and questions
Please email me at [email protected]
Marj
Written 29th July 2012
For your AV chose the part you would like and crop it by 150 x 150
Please remember to
add your copyright to your forum tag and AV
Hope you enjoyed my tut and questions
Please email me at [email protected]
Marj
Written 29th July 2012
