Japan Spring

This tutorial is my own creation and any resemblance to any other tutorial, is purely coincidental.
Please do not copy as use as your own work
This tutorial is written using PSP 9 but it can also be done in other versions
Filter MuRa's Copies
Filter Factory Gallery A Ray Gun
Filterr Eye Candy 5
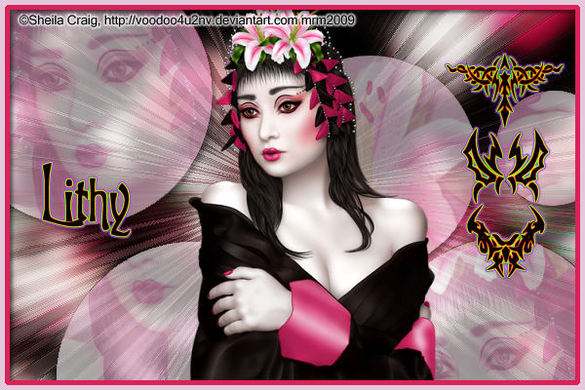
Tube of choice I used one by Sheila Craig
You can find her work here http://voodoo4u2nv.deviantart.com
BUT please ask for permission before you use it
Drop Shadow I used was H & V 3 Opacity 50 Blur 5
Font of choice I used Trinigan
My mask no 4 Here http://pspbymarj.weebly.com/masks.html
Lets begin
Remember to save often
Step 1.
Open a image 600 x 400 copy and paste your Tube apply MuRa's Copies Wallpaper rotate default settings,
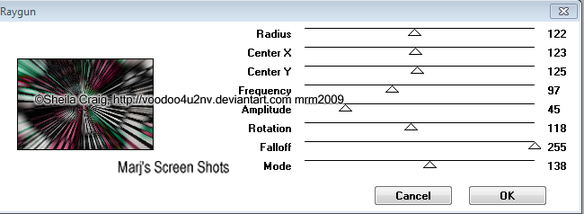
Adjust, Gaussian Blur 10 duplicate, working on this layer apply Factory Gallery A Ray Gun, shot 1,
Apply soft light and lower the opacity to 50, Effects, Enhance Edges
Please do not copy as use as your own work
This tutorial is written using PSP 9 but it can also be done in other versions
Filter MuRa's Copies
Filter Factory Gallery A Ray Gun
Filterr Eye Candy 5
Tube of choice I used one by Sheila Craig
You can find her work here http://voodoo4u2nv.deviantart.com
BUT please ask for permission before you use it
Drop Shadow I used was H & V 3 Opacity 50 Blur 5
Font of choice I used Trinigan
My mask no 4 Here http://pspbymarj.weebly.com/masks.html
Lets begin
Remember to save often
Step 1.
Open a image 600 x 400 copy and paste your Tube apply MuRa's Copies Wallpaper rotate default settings,
Adjust, Gaussian Blur 10 duplicate, working on this layer apply Factory Gallery A Ray Gun, shot 1,
Apply soft light and lower the opacity to 50, Effects, Enhance Edges
Step 2
Apply my mask, use your magic wand use the settings in shot 2 and click in the balls one at a time,
Invert and copy and paste your tube, hit delete deselect,
do this for each ball else you will have bits showing in each ball,
and place them in balls were you want them see my tag for ref,
when you have copied and pasted the tube where you want,
close all layers apart from the tubs layers and ball layer merge visible,
Adjust, Hue and saturation both set to 0 apply a drop shadow, name this Ball
Shot 2

Step 3
Still working on the ball layer apply Soft light and lower opacity down to 80,
copy and paste your tube resize if it needs it, I resized mine by 80%,
apply a drop shadow ,do shift D twice,
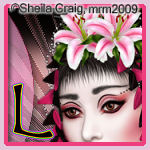
these will be the images you need for your forum tag and AV put them to one side.
Step 4
New raster layer fill will a colour from your tube I used the blue from her dress,
select all modify by 10 keep selected expand by 5 invert and fill with another from your tube select none.
Add your copyright and name, I also add a few letters from the font Tattoo just to give a Japanese feel,
and gave my name and the tattoo font gradient glow Width 3 colour Pride.
Step 5
Open up one of the images you set to one side use your section tool do a section 600 x 250 crop to image,
repeat step 4, add your copyright and name,
open up your other image and crop to 150 x 150,
PLEASE remember if you use any part of tube add your copyright
Hope you enjoyed my tutorial and questions you may email me at [email protected]
Marj
For my mask right click and save image, or put in your mask folder in PSP
Written 22nd September 2012
Still working on the ball layer apply Soft light and lower opacity down to 80,
copy and paste your tube resize if it needs it, I resized mine by 80%,
apply a drop shadow ,do shift D twice,
these will be the images you need for your forum tag and AV put them to one side.
Step 4
New raster layer fill will a colour from your tube I used the blue from her dress,
select all modify by 10 keep selected expand by 5 invert and fill with another from your tube select none.
Add your copyright and name, I also add a few letters from the font Tattoo just to give a Japanese feel,
and gave my name and the tattoo font gradient glow Width 3 colour Pride.
Step 5
Open up one of the images you set to one side use your section tool do a section 600 x 250 crop to image,
repeat step 4, add your copyright and name,
open up your other image and crop to 150 x 150,
PLEASE remember if you use any part of tube add your copyright
Hope you enjoyed my tutorial and questions you may email me at [email protected]
Marj
For my mask right click and save image, or put in your mask folder in PSP
Written 22nd September 2012
