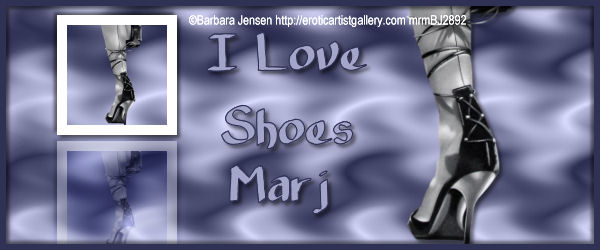
I love Shoes

This tutorial is my own creation and any resemblance to any other tutorial, is purely coincidental.
Please do not copy as use as your own work
This tutorial is written using PSP 9 but it can also be done in other versions
Filter Two Moon Vertical Ripple
Filter AAA Foto Frame
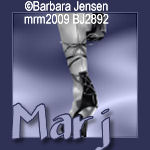
Tube of choice- I using the work of Barbara Jensen
Do not use unless you have a license this can be purchased at her site
Here http://www.barbarajensentubes.com/
Drop Shadow I used was H & V 3 Opacity 50 Blur 5
Font of choice I used 2Peas Peppermint
Lets begin
Make a Liner Gradient Angel 0 and Repeats 3,
I used for the foreground #60658b and for the back ground I used #9093b4
Remember to save often
Step 1
Open a image 600 x 400 fill your back ground colour name this background,
add a new raster layer and fill with your gradient working on this,
Effects Distortion Wave, Horizontal, Amplitude 4 Wavelength 10,
Vertical Displacement Amplitude 4 and Wavelength 20 Repeat, click OK.
Apply Two Moon Vertical Ripple Amount 13 and Darkness you are 10,
still on this layer Adjust Motion Blur Angle 45 and Strength 100.,
now apply Effects Distortion Wave,
with the same settings as before and apply Luminance L Merge Visible
Step 1
Copy and paste your tube resize if its needed give it a drop shadow crop your tag at this stage,
Step 3
Copy your tube and resize I resized mine by 30%, as you want it to fit in the box you will make,
see my tag for ref copy your back ground layer and and crop a image 120 x 120,
New raster layer fill with white Select all and modify contact by 4 hit delete deselect,
paste your resized tube move down under the white border and crop this image,
Merge Visible.
Step 4
Copy and paste the small image and paste on your main image apply a drop shadow
redo the drop shadow but H and V -3,
Duplicate twice and place as my tag, play with the mode till you are happy, the middle one
I set at Soft light and the bottom one Screen.
Step 5
Shift D and make two images these are for your forum set,
put them both to one side for now
Step 6
Active your background layer new raster layer fill with white Select all Modify contact by 8
and hit delete Select none move this layer to top of your image,
add drop shadow same settins as on your small tag you made.
Add your copyright and name and a saying that fits your tube
Step 7
Open one of the images you put to one size pick the parts you want to keep and crop 600 x 250
And repeat step 6, open up your other image and crop by 150 x 150 and again repeat step 6
PLEASE remember if you use any part of your tube to add the artists copyright
Hope you enjoyed my tutorial any query's please email me [email protected]
Marj
Written 29th April 2013
Please do not copy as use as your own work
This tutorial is written using PSP 9 but it can also be done in other versions
Filter Two Moon Vertical Ripple
Filter AAA Foto Frame
Tube of choice- I using the work of Barbara Jensen
Do not use unless you have a license this can be purchased at her site
Here http://www.barbarajensentubes.com/
Drop Shadow I used was H & V 3 Opacity 50 Blur 5
Font of choice I used 2Peas Peppermint
Lets begin
Make a Liner Gradient Angel 0 and Repeats 3,
I used for the foreground #60658b and for the back ground I used #9093b4
Remember to save often
Step 1
Open a image 600 x 400 fill your back ground colour name this background,
add a new raster layer and fill with your gradient working on this,
Effects Distortion Wave, Horizontal, Amplitude 4 Wavelength 10,
Vertical Displacement Amplitude 4 and Wavelength 20 Repeat, click OK.
Apply Two Moon Vertical Ripple Amount 13 and Darkness you are 10,
still on this layer Adjust Motion Blur Angle 45 and Strength 100.,
now apply Effects Distortion Wave,
with the same settings as before and apply Luminance L Merge Visible
Step 1
Copy and paste your tube resize if its needed give it a drop shadow crop your tag at this stage,
Step 3
Copy your tube and resize I resized mine by 30%, as you want it to fit in the box you will make,
see my tag for ref copy your back ground layer and and crop a image 120 x 120,
New raster layer fill with white Select all and modify contact by 4 hit delete deselect,
paste your resized tube move down under the white border and crop this image,
Merge Visible.
Step 4
Copy and paste the small image and paste on your main image apply a drop shadow
redo the drop shadow but H and V -3,
Duplicate twice and place as my tag, play with the mode till you are happy, the middle one
I set at Soft light and the bottom one Screen.
Step 5
Shift D and make two images these are for your forum set,
put them both to one side for now
Step 6
Active your background layer new raster layer fill with white Select all Modify contact by 8
and hit delete Select none move this layer to top of your image,
add drop shadow same settins as on your small tag you made.
Add your copyright and name and a saying that fits your tube
Step 7
Open one of the images you put to one size pick the parts you want to keep and crop 600 x 250
And repeat step 6, open up your other image and crop by 150 x 150 and again repeat step 6
PLEASE remember if you use any part of your tube to add the artists copyright
Hope you enjoyed my tutorial any query's please email me [email protected]
Marj
Written 29th April 2013
