Coffee and Cream
This tutorial is my own creation and any resemblance to any other tutorial, is purely coincidental.
Please do not copy as use as your own work if you wish to translate please email me
It’s assumed that you have working knowledge on how to use filters/plugins.
This tutorial is written using PSP 9 but it can also be done in other versions
Animation Shop I will refer to this as AS
Filter MuRa's Meister Copies
Filter Xero Fritillary
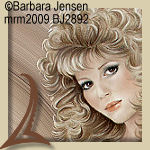
Tube of choice- I using the work of Barbara Jensen, you can get her work here http://www.barbarajensentubes.com/
Drop Shadow I used was H & V 2 Opacity 40 Blur 5
Font of choice I used Quasari
Lets begin
Remember to save often
Step 1.
Open a image 600 x 400 copy and paste you tube,
apply MuRa's Meister Copies Wall Paper, you want the tube to cover the image,
this depends on your tube so play around with the number,
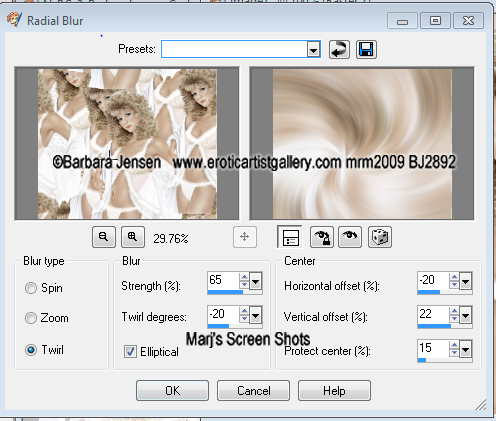
till your image is covered mine was 12, still on this layer Adjust Radial Blur shot 1,
Effects Edge Effects Enhance, I did this twice.
Please do not copy as use as your own work if you wish to translate please email me
It’s assumed that you have working knowledge on how to use filters/plugins.
This tutorial is written using PSP 9 but it can also be done in other versions
Animation Shop I will refer to this as AS
Filter MuRa's Meister Copies
Filter Xero Fritillary
Tube of choice- I using the work of Barbara Jensen, you can get her work here http://www.barbarajensentubes.com/
Drop Shadow I used was H & V 2 Opacity 40 Blur 5
Font of choice I used Quasari
Lets begin
Remember to save often
Step 1.
Open a image 600 x 400 copy and paste you tube,
apply MuRa's Meister Copies Wall Paper, you want the tube to cover the image,
this depends on your tube so play around with the number,
till your image is covered mine was 12, still on this layer Adjust Radial Blur shot 1,
Effects Edge Effects Enhance, I did this twice.
Step 2
Copy and paste your tube resize if necessary give it your favorite drop shadow.
Step 3
Take you section tool and make a square Left 0 Top 0 Right 200 Bottom 400,
promote section to layer, fill with a light colour from your tube,
take your section tool again and make another section,
this time Left 200 and Right 400, fill again,
now make your third section Left 400 Right 600 fill again,
apply Xero Fritillary, name this three layers Fritillary 1, 2 and 3,
Effects Edge Effects, Enhance on all your three layers,
give the layers a drop shadow,close the layers of Fritillary off.
Shift D twice this is for your AV, put this image's to one side
Step 3
New layer fill with a light colour from your tube,
Select all Modify Contact by 10 hit delete, select none.
Add your copywrite name and a saying to fit your tube,
or use the same as mine
Step 4
Open up AS and with your Fritillary 2 and 3, closed off copy merged,
and take to AS copy as new image,
back to PSP close off the Fritillary 1 layer open up the Fritillary 2 layer,
copy merged, take to AS and paste after current frame,
back to PSP close off the Fritillary 2 layer open up the Fritillary 3 layer,
this will give you four layers set the first three to 50 and last one to 150
Step 5
Back to PSP open up one of the images you put to one side,
and take your crop tool and make a section 600 X 400
crop the part of image you want to use, and repeat steps 3 and 4
Step 4
For your AV crop the image you want to 150 X 150, and repeat step 4 only
Please remember if you use any part of your tube to add your copyright
Hope you enjoy my tutorial, and problems please feel free to email me at [email protected] please remember this is just a guide, I would love to see any wrk you have made using my tutorails
Marj
Written 17th August 2013
