Blondie


This tutorial is my own creation and any resemblance to any other tutorial, is purely coincidental.
Please do not copy as use as your own work
This tutorial is written using PSP 9 but it can also be done in other versions
Animation Shop
Filter Factory Gallery D Ring Tile
Filter Filter Unlimited 2.0 Special Effects Square Bumps
Tubes of choice you need two a close up and normal, I used Jamie Kidd I brought mine when she was at CLIM
She is now at CDO here http://cdoestore.com/
Drop Shadow I used was H & V 3 Opacity 50 Blur 5
Font of choice I used Bix Antique Script
A flower or a cluster I used one of Jamie Kidd's she has some lovely ones
Lets begin
Remember to save often
Step 1
Open a image 600 x250 fill with a gradient made with Foreground #ffffff and background #936130
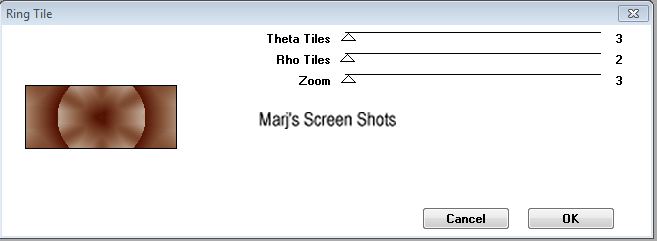
duplicate this layer and apply Factory Gallery D Ring Tile, default settings see shot 1
Shot 1
Please do not copy as use as your own work
This tutorial is written using PSP 9 but it can also be done in other versions
Animation Shop
Filter Factory Gallery D Ring Tile
Filter Filter Unlimited 2.0 Special Effects Square Bumps
Tubes of choice you need two a close up and normal, I used Jamie Kidd I brought mine when she was at CLIM
She is now at CDO here http://cdoestore.com/
Drop Shadow I used was H & V 3 Opacity 50 Blur 5
Font of choice I used Bix Antique Script
A flower or a cluster I used one of Jamie Kidd's she has some lovely ones
Lets begin
Remember to save often
Step 1
Open a image 600 x250 fill with a gradient made with Foreground #ffffff and background #936130
duplicate this layer and apply Factory Gallery D Ring Tile, default settings see shot 1
Shot 1
Step 2
Grab your Selection tool set to Circle and make a circle covering the middle
if it does not cover it all, go Selection, Edit Section this will change colour,
active your deform tool and pull it out or in, you will not get it dead on, promote section to layer,
keep selected. invert, copy and paste your close up hit delete, deselect, merge down,
lower opacity down to 90 give this a drop shadow H & V 3 Opacity 50 Blur 5, the do H & V -3,
name this close up. you can now delete the copy of your back ground
Step 3
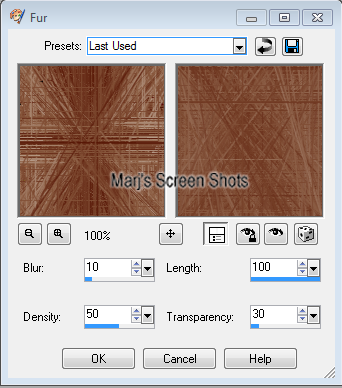
Active your promoted layer and apply Effects Texture effects fur, settings as shot 2, apply screen on your tube.
Shot 2
Grab your Selection tool set to Circle and make a circle covering the middle
if it does not cover it all, go Selection, Edit Section this will change colour,
active your deform tool and pull it out or in, you will not get it dead on, promote section to layer,
keep selected. invert, copy and paste your close up hit delete, deselect, merge down,
lower opacity down to 90 give this a drop shadow H & V 3 Opacity 50 Blur 5, the do H & V -3,
name this close up. you can now delete the copy of your back ground
Step 3
Active your promoted layer and apply Effects Texture effects fur, settings as shot 2, apply screen on your tube.
Shot 2
Step 4
Activate your background layer select all copy and paste your flower tube into SECTION deselect
Step 5
Active your top layer and copy and paste your tube, position where you like,
I mirrored mine and put it on right side, once happy, crop your image.
At this stage do shift and D this is for your AV.
Step 6
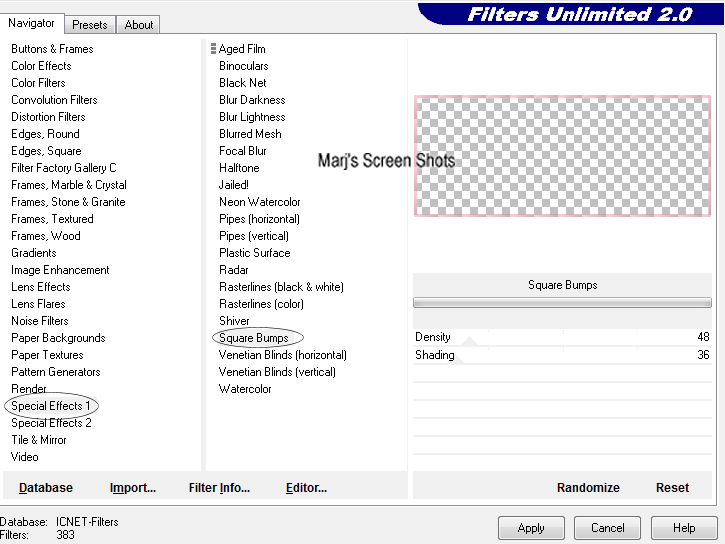
New raster layer fill with a soft colour from your tube,select all modify by 6 pixels, hit delete deselect,
still on this layer apply Filter Unlimited 2.0 Special Effects1 Square Bumps,
shot 3 give your frame the same drop shadow
Shot 3
Activate your background layer select all copy and paste your flower tube into SECTION deselect
Step 5
Active your top layer and copy and paste your tube, position where you like,
I mirrored mine and put it on right side, once happy, crop your image.
At this stage do shift and D this is for your AV.
Step 6
New raster layer fill with a soft colour from your tube,select all modify by 6 pixels, hit delete deselect,
still on this layer apply Filter Unlimited 2.0 Special Effects1 Square Bumps,
shot 3 give your frame the same drop shadow
Shot 3
Add your name and copyright and save.
Step 7
Open the image you put to one side crop it by 150 X 150 on any part of the image,
repeat step 6 but please rememeber to add artists copyright.
Hope you enjoyed my tut would love to see your results
Marj
Written on 5th May 2012
Step 7
Open the image you put to one side crop it by 150 X 150 on any part of the image,
repeat step 6 but please rememeber to add artists copyright.
Hope you enjoyed my tut would love to see your results
Marj
Written on 5th May 2012
