Sphere
This tutorial is my own creation and any resemblence to any other tutorial, is purely conicidental.
Please do not copy and use as your own work
What we will need for this tutorial:-
Paint Shop Pro (PSP) any version mine was done in PSP9
Animation Shop
Filters:
Ulead Effects Gif-X2.0
MuRa's Mueister Copies
Tube of choice - I am using the work of Fred Winkler he's now at CDO Please do not use unless you have a license,
this can be purchased here http://www.cdoestore.com/
Font of choice I used Brock Script
This is in two parts and so,we are going to make the Ball first
Two colours from your tube one light and one a bit darker
I used #F7CA4B as foreground #B43317 as background Gradient liner Angle 90 Repeats 0, invert ticked
Let's get started
Step 1
Open a new raster layer 100 x100
DO not fill
Using your Pre-set Tool Eclipse make a sphere in middle of your image using a gradient made with two colours from your tube,
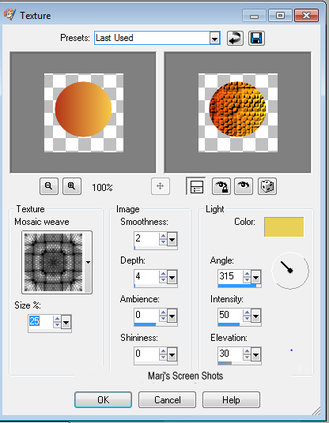
Objects Align, centre of canvas, convert to raster layer, Effects Texture
and choose one you like, I used Shot 1
Or do as I did if you use same tube, copy,and paste tube, and cut out the ball in her hand,
using your erase to get rid of the back ground.
Please do not copy and use as your own work
What we will need for this tutorial:-
Paint Shop Pro (PSP) any version mine was done in PSP9
Animation Shop
Filters:
Ulead Effects Gif-X2.0
MuRa's Mueister Copies
Tube of choice - I am using the work of Fred Winkler he's now at CDO Please do not use unless you have a license,
this can be purchased here http://www.cdoestore.com/
Font of choice I used Brock Script
This is in two parts and so,we are going to make the Ball first
Two colours from your tube one light and one a bit darker
I used #F7CA4B as foreground #B43317 as background Gradient liner Angle 90 Repeats 0, invert ticked
Let's get started
Step 1
Open a new raster layer 100 x100
DO not fill
Using your Pre-set Tool Eclipse make a sphere in middle of your image using a gradient made with two colours from your tube,
Objects Align, centre of canvas, convert to raster layer, Effects Texture
and choose one you like, I used Shot 1
Or do as I did if you use same tube, copy,and paste tube, and cut out the ball in her hand,
using your erase to get rid of the back ground.
Or do as I did if you use same tube, copy,and paste tube,
and cut out the ball in her hand, using your erase to get rid of the back ground.
Step 2
Ulead Effects Gif-X2.0
Shot 2
and cut out the ball in her hand, using your erase to get rid of the back ground.
Step 2
Ulead Effects Gif-X2.0
Shot 2
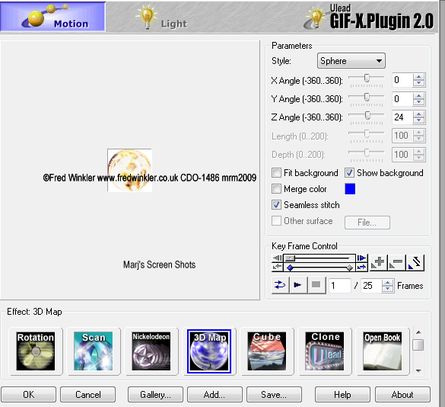
Click on the save button, make the file name “sphere” and location to a place where you can easily find it later
Click on save... Now click on the cancel button to close the plugin
Close the sphere image that is in PSP as it is no longer needed
Step 3
Now we will make the tag open a new image 600 x 250
Copy and paste your tube, as a new layer
MuRa's Copies Wallpaper Shrink with the following settings Shot 3
Click on save... Now click on the cancel button to close the plugin
Close the sphere image that is in PSP as it is no longer needed
Step 3
Now we will make the tag open a new image 600 x 250
Copy and paste your tube, as a new layer
MuRa's Copies Wallpaper Shrink with the following settings Shot 3

If you have any gaps duplicate,as you want the whole image covered
mirror, flip then merge visible
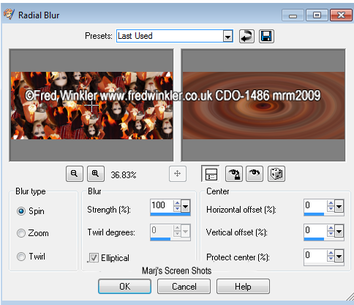
Duplicate, keep this layer active,
Adjust radial blur, with the following settings Shot 4
mirror, flip then merge visible
Duplicate, keep this layer active,
Adjust radial blur, with the following settings Shot 4
Effects Enhance on the layer properties, lower the opacity to around 50 Now go back to your original layer, Adjust, Blur Gaussian Blur 20
Copy and paste your tube as a new layer, duplicate and move the duplicated one over to the right hand side,
then move this layer between the copies and radial blur layers,
Change the layer to Blend Mode to Luminance (L) or lower the opacity, play around to get the best effect
Step 4
Add a new raster layer, fill with the gradient, Select all, modify contact by 6, delete
select none give this a nice drop shadow I used V H 2 Opacity 50 Blur 5
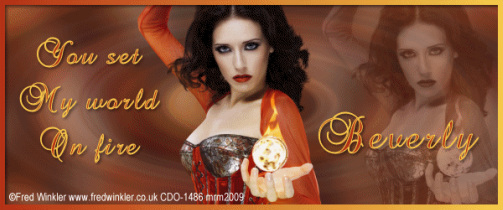
Step 5
Add your copyright and name and a saying if you wish
Merge Visible or Merge All (flatten)
Now is the time to make your Aviator
Press Shift + D to copy your tag, crop image 150 x 150,
Repeat Step 4 and remember to add any copyright info, if you use any part of the tube in you avatar
Step 6
Open up Animation shop and find your sphere you made earlier,
You will find if you use same tube as me, you will need to resize it, Edit select all, resize
Back on your tag Edit, duplicate until you have 25 frames then Edit select all, propagate paste,
Now click on your sphere and do the same.
Take the sphere over to your tag and place it where you wish, I put mine in her hand
There you are done I hope you enjoyed my tutorial
Marj
Written by Marj 23 July 2011
Copy and paste your tube as a new layer, duplicate and move the duplicated one over to the right hand side,
then move this layer between the copies and radial blur layers,
Change the layer to Blend Mode to Luminance (L) or lower the opacity, play around to get the best effect
Step 4
Add a new raster layer, fill with the gradient, Select all, modify contact by 6, delete
select none give this a nice drop shadow I used V H 2 Opacity 50 Blur 5
Step 5
Add your copyright and name and a saying if you wish
Merge Visible or Merge All (flatten)
Now is the time to make your Aviator
Press Shift + D to copy your tag, crop image 150 x 150,
Repeat Step 4 and remember to add any copyright info, if you use any part of the tube in you avatar
Step 6
Open up Animation shop and find your sphere you made earlier,
You will find if you use same tube as me, you will need to resize it, Edit select all, resize
Back on your tag Edit, duplicate until you have 25 frames then Edit select all, propagate paste,
Now click on your sphere and do the same.
Take the sphere over to your tag and place it where you wish, I put mine in her hand
There you are done I hope you enjoyed my tutorial
Marj
Written by Marj 23 July 2011
