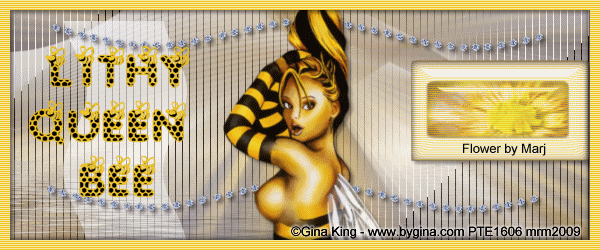
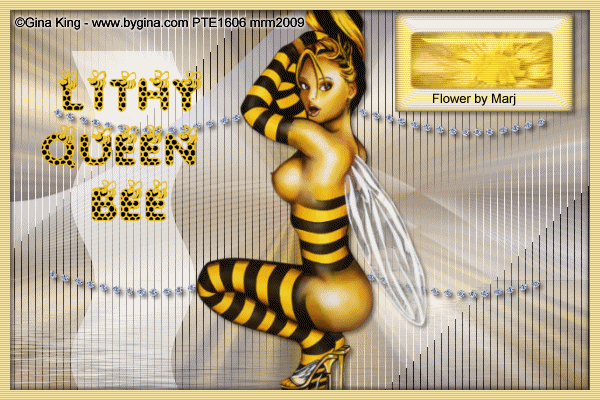
Queen Bee
This tutorial is my own creation and any resemblance to any other tutorial, is purely coincidental.
Please do not copy as use as your own work
This tutorial is written using PSP 9 but it can also be done in other versions
Animation Shop
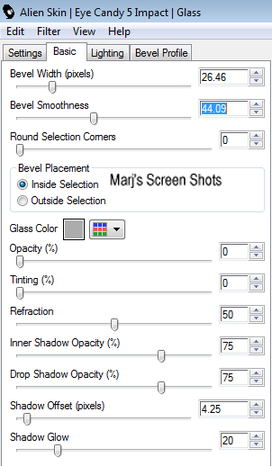
Filter Alien Skin Impact Glass
Filter Flaming Pear Flood
Filter Tramages Tow the Line
Filter Adjust Variations
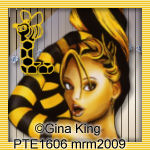
Tube of choice, I used Gina King please do not use unless you have a licence you can get her work
here http://psptubesemporium.com/index.php?p=home
Font of choice I used Save the Honey Bees
The flower I used was from my garden
Lets begin
Remember to save often
I have named all my layers as there a lot and it makes it easier to work with
Step 1
We are going to first make a picture, open a image width 176 x height 80,
copy and paste your flower, see mine for ref: apply Alien Skin Impact Glass, Shot 1,
open a new image W 222 x H 126 fill with white and copy and paste the new flower image you made,
I gave the flower and the background a blinds effect,
width 2 opacity 59 horizontal and light from left ticked colour white, merge down, now put to one side,
you can leave this off if you wish,
Shot 1
Please do not copy as use as your own work
This tutorial is written using PSP 9 but it can also be done in other versions
Animation Shop
Filter Alien Skin Impact Glass
Filter Flaming Pear Flood
Filter Tramages Tow the Line
Filter Adjust Variations
Tube of choice, I used Gina King please do not use unless you have a licence you can get her work
here http://psptubesemporium.com/index.php?p=home
Font of choice I used Save the Honey Bees
The flower I used was from my garden
Lets begin
Remember to save often
I have named all my layers as there a lot and it makes it easier to work with
Step 1
We are going to first make a picture, open a image width 176 x height 80,
copy and paste your flower, see mine for ref: apply Alien Skin Impact Glass, Shot 1,
open a new image W 222 x H 126 fill with white and copy and paste the new flower image you made,
I gave the flower and the background a blinds effect,
width 2 opacity 59 horizontal and light from left ticked colour white, merge down, now put to one side,
you can leave this off if you wish,
Shot 1
Step 2
Open a image 600 x400 fill with a gradient made two colours from your Tube,
a light and dark one with foreground and background Linear Angle 0 Repeats 1 Invert NOT checked,
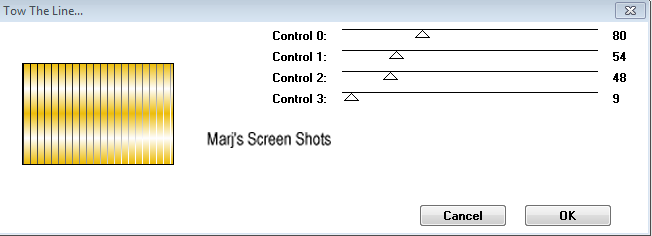
apply, Tramages Tow the Line.
Shot 2
Open a image 600 x400 fill with a gradient made two colours from your Tube,
a light and dark one with foreground and background Linear Angle 0 Repeats 1 Invert NOT checked,
apply, Tramages Tow the Line.
Shot 2
Step 3
Still on this layer apply Adjust Variations click once on original, and twice on lighter.
Name this background
Step 4
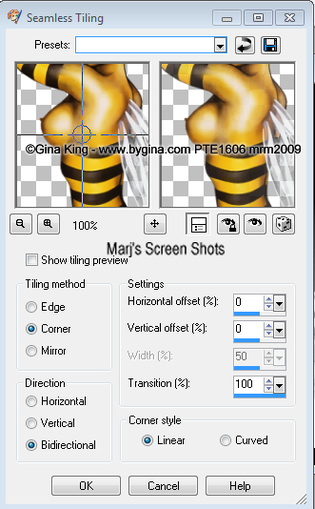
Now copy and paste your tube resize if its needed, apply Effects Image Effects Seamless Tiling shot 3
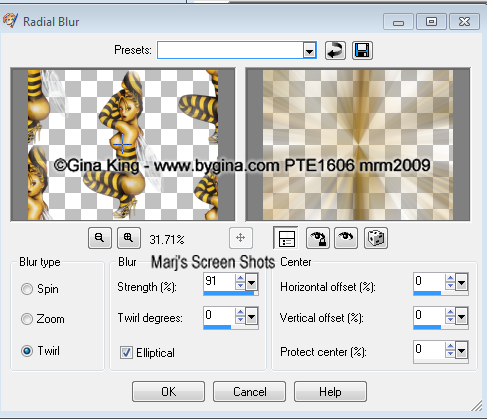
now apply Adjust Blur Radial Blur shot 4 name this layer Radial Blur
Shot 3 and shot 4
Still on this layer apply Adjust Variations click once on original, and twice on lighter.
Name this background
Step 4
Now copy and paste your tube resize if its needed, apply Effects Image Effects Seamless Tiling shot 3
now apply Adjust Blur Radial Blur shot 4 name this layer Radial Blur
Shot 3 and shot 4
|
|
Step 4
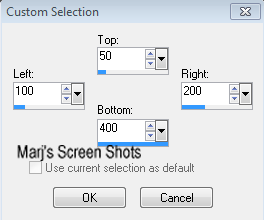
New raster layer change your background colour to #ffffff take your section tool and do a section shot 5,
fill with white, deselect, apply Effects Distortion Waves. Lower this to 60 opacity name this wave 1
Shot 5
New raster layer change your background colour to #ffffff take your section tool and do a section shot 5,
fill with white, deselect, apply Effects Distortion Waves. Lower this to 60 opacity name this wave 1
Shot 5
Step 5
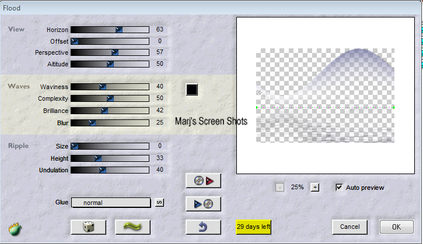
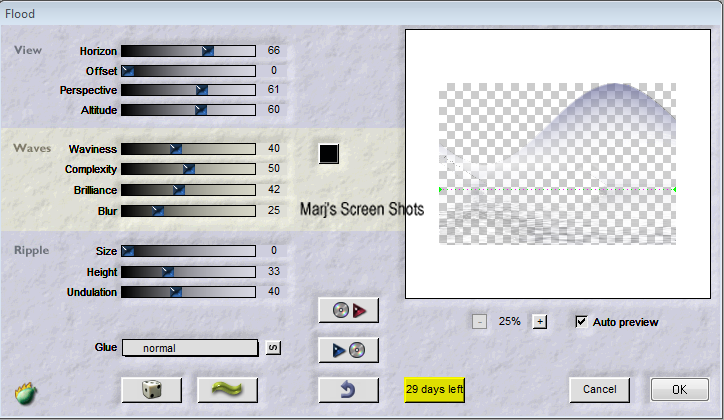
Add my wave this is at bottom of tutorial, right click and save. now apply Flaming Pear Flood, name this wave 1 shot 6,
duplicate, and apply Flaming Pear Flood to this layer change the settings to shot 7,
name this wave 2 close this layer off now.
Shot 6 and shot 7
Add my wave this is at bottom of tutorial, right click and save. now apply Flaming Pear Flood, name this wave 1 shot 6,
duplicate, and apply Flaming Pear Flood to this layer change the settings to shot 7,
name this wave 2 close this layer off now.
Shot 6 and shot 7
|
|
Step 7
I had a wave strip of diamonds, that I added, I duplicated this, flip and merged down give it a nice drop shadow,
I used V & H 3 Opacity 40 and Blur 5 copy and paste your tube,
give it a drop shadow I used the same as above,
do shift and D twice and put to one side for now, rename this tube
Step 8
Copy and paste the flower image you made earlier, place to one side name this flower picture,
and place where you like,give it the same drop shadow,
new raster layer fill with a colour from your tube, select all modify contact by 10 hit delete,
deselect I gave this a blinds effect as I did on my flower image, above,
and apply the same drop shadow.
Add you copyright name and a saying open up Animation Shop
Step 9
With your wave layer 2 closed copy merged and take over to AS and paste as a new layer,
back to PSP close wave 1 and open wave 2 copy merge and take to AS and paste after current frame,
I set the frame properties to 30
Step 10
Open up one of the images you put to one side and and do a crop 600 X 250
move your tube etc. around before you do this,
new raster layer fill with a colour from your tube, select all modify by 10 hit delete, deselect
I gave this a blinds effect as I did on my flower image, above,
and apply the same drop shadow. now repeat step 10.
Step 11
Open your other image you put to one side crop any part of it to 150 x 150,
new layer fill with the same colour as you used before, select all but modify contact by 8,
hit delete and deslect, apply same blinds settings, and as we used the tube in the tag
PLEASE remember to add your copyright to AV
There done hope you enjoyed my tutorial would love to see your results
Marj
Any questions please email me at [email protected]
Written on 10th May 2012