Happy Halloween

This tutorial is my own creation and any resemblance to any other tutorial, is purely coincidental.
Please do not copy as use as your own work, if you wish to translate please email me
This tutorial is written using PSP 9 but it can also be done in other versions
Filter Dragon Fly Sinedots 2
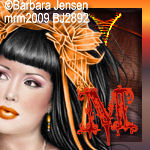
I using the great work of Barbara Jensen, do not use unless you have a license
This can be purchased at her site here http://www.barbarajensentubes.com/
Font I used A_Lolita Scorned
Gradient Liner, Angle 0 Repeats 0
Drop Shadow I used was H & V 3 Opacity 50 Blur 5
Step 1
Open up a image 600 x250 fill with a gradient made with two colours for your tube,
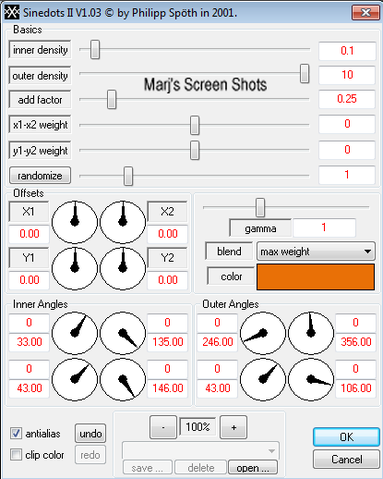
duplicate, working on the original apply Filter Sinedots see shot 1
Apply this to the duplicate and mirror this, soft light, Effects User Defined Filter Emboss 3,
merge visible name this background.
Shot 1
Please do not copy as use as your own work, if you wish to translate please email me
This tutorial is written using PSP 9 but it can also be done in other versions
Filter Dragon Fly Sinedots 2
I using the great work of Barbara Jensen, do not use unless you have a license
This can be purchased at her site here http://www.barbarajensentubes.com/
Font I used A_Lolita Scorned
Gradient Liner, Angle 0 Repeats 0
Drop Shadow I used was H & V 3 Opacity 50 Blur 5
Step 1
Open up a image 600 x250 fill with a gradient made with two colours for your tube,
duplicate, working on the original apply Filter Sinedots see shot 1
Apply this to the duplicate and mirror this, soft light, Effects User Defined Filter Emboss 3,
merge visible name this background.
Shot 1
Step 2
Copy and paste your close up apply soft,
Adjust Hue and Saturation, both at 0, crop at this stage.
Add a new raster layer and fill again with your gradient, flip, Select all Modify by 8, hit delete, select none and flip,
Name this border give this a drop shadow of choice, then repeat but do H & V -5,
If you use drop shadow same as me
Step 3
Copy and paste your tube and position it on Left hand side, give it a drop shadow, crop your image,
Shift D this is for your AV, and put to one side for now
Add copyright and name
Step 4
Open up the image you set to one side and crop 150 x 150 the piece of tag you want to use
PLEASE remember if you use any part of your tube to add your copyright
When happy save
Hope you enjoyed my tutorial, any questions please email me at [email protected]
Marj
Written 27th September 2012
