This tutorial is my own creation and any resemblance to any other tutorial, is purely coincidental.
Please do not copy and use as your own work.
If you wish to translate please email me
It’s assumed that you have working knowledge on how to use filters/plugins.
This tutorial is written using P.S.P 16
But it can also be done in other versions
Animation Shop I will Ref to this as AS
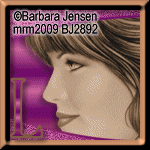
Tube of choice- I used Barbara Jensen you can get her work here
http://www.barbarajensentubes.com/
Font of choice I used Yataghan
Drop Shadow V & H 4 Opacity 40 Bur 5
Please remember to Adjust and Sharpen your Tube if you resize
Remember to save often
Step 1
Open a new image 600 x 300 fill with a gradient of choice.
Liner, Angle and Repeats 0, Invert Unticked.
Name this background.
As you can see my gradient had lines.
Take your Selection tool and set on Rectangle, go round the lines.
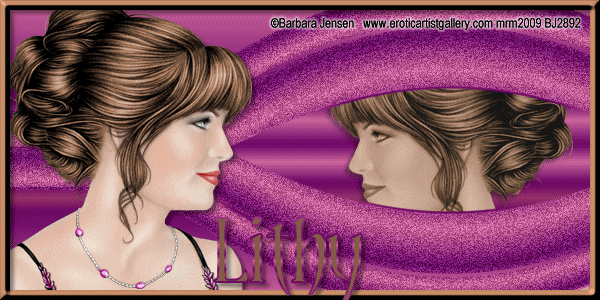
See my tag for ref:
Promote to layer, select none
Duplicate and working on this layer move down.
Merge these two layer's.
Step 2
Working on this layer.
Effects, Distortion, Wrap.
Settings Horizontal 50 Vertical -50.
Size 70 Strength 60
Duplicate and Flip Vertical. Merger down.
Name this Warp
Step 3
Copy and paste your tube, place on left hand side.
Give it a drop shadow, crop at this stage.
Step 4
New layer fill with a colour of choice I used # #835d44 from her hair.
Select all Modify contact by 10 hit delete select none.
Effects, 3D Effects, inner bevel no 2
Give your border a drop shadow.
Step 5
Active your Wrap layer.
Select all. Float, De-float, Contact by 2, Invert
Copy and paste your tube again mirror, and place on right hand side.
See my tag for Ref:
Effects, Photo Effects, Sepia Toning, amount to age 75.
Add your Artists copyright and your name, and if you wish a saying.
Give your name and saying the same drop shadow.
Shift D this is for your AV
Step 6
Active your Wrap layer.
Adjust, Add noise settings Uniform, Monochrome ticked, and Noise at 30
Copy merged and take over to A.S, paste as a new Image.
Back to P.S.P. undo Noise, redo it but this time make the Noise 35
Copy merged and take over to A.S, paste After-image current frame.
If happy save as a G.I.F.
Step 7
Active the image you put to one side and crop 150 X 150.
Repeat Step 6
IF you use any part of your tube, remember to add your Artists copyright
Hope you enjoy my tutorial.
Any problems please feel free to email me at [email protected]
Please remember this is just a guide.
I would love to see any work you have made using my tutorials
And with your permission show them on my site
Marj
Written 6th October 2014
Please do not copy and use as your own work.
If you wish to translate please email me
It’s assumed that you have working knowledge on how to use filters/plugins.
This tutorial is written using P.S.P 16
But it can also be done in other versions
Animation Shop I will Ref to this as AS
Tube of choice- I used Barbara Jensen you can get her work here
http://www.barbarajensentubes.com/
Font of choice I used Yataghan
Drop Shadow V & H 4 Opacity 40 Bur 5
Please remember to Adjust and Sharpen your Tube if you resize
Remember to save often
Step 1
Open a new image 600 x 300 fill with a gradient of choice.
Liner, Angle and Repeats 0, Invert Unticked.
Name this background.
As you can see my gradient had lines.
Take your Selection tool and set on Rectangle, go round the lines.
See my tag for ref:
Promote to layer, select none
Duplicate and working on this layer move down.
Merge these two layer's.
Step 2
Working on this layer.
Effects, Distortion, Wrap.
Settings Horizontal 50 Vertical -50.
Size 70 Strength 60
Duplicate and Flip Vertical. Merger down.
Name this Warp
Step 3
Copy and paste your tube, place on left hand side.
Give it a drop shadow, crop at this stage.
Step 4
New layer fill with a colour of choice I used # #835d44 from her hair.
Select all Modify contact by 10 hit delete select none.
Effects, 3D Effects, inner bevel no 2
Give your border a drop shadow.
Step 5
Active your Wrap layer.
Select all. Float, De-float, Contact by 2, Invert
Copy and paste your tube again mirror, and place on right hand side.
See my tag for Ref:
Effects, Photo Effects, Sepia Toning, amount to age 75.
Add your Artists copyright and your name, and if you wish a saying.
Give your name and saying the same drop shadow.
Shift D this is for your AV
Step 6
Active your Wrap layer.
Adjust, Add noise settings Uniform, Monochrome ticked, and Noise at 30
Copy merged and take over to A.S, paste as a new Image.
Back to P.S.P. undo Noise, redo it but this time make the Noise 35
Copy merged and take over to A.S, paste After-image current frame.
If happy save as a G.I.F.
Step 7
Active the image you put to one side and crop 150 X 150.
Repeat Step 6
IF you use any part of your tube, remember to add your Artists copyright
Hope you enjoy my tutorial.
Any problems please feel free to email me at [email protected]
Please remember this is just a guide.
I would love to see any work you have made using my tutorials
And with your permission show them on my site
Marj
Written 6th October 2014
