Tunnel

This tutorial is my own creation and any resemblence to any other tutorial, is purely conicidental.
Please do not copy and use as your own work
What we will need for this tutorial:-
Paint Shop Pro (PSP) any version mine was done in PSP 9
Filter MuRa's Meister Copies
Filter Factory D Tunnel Tile
Filter Dsb Flux Bright Noise
Filter Eye Candy Impact Perpective Shadow
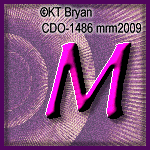
Tube of choice- KT Bryan
Please do not use unless you have a license for her work
I purchased her art at CDO but her Tubes are no longer available
Font of choice I used Androgyne_TB
Remember to save as you go along
Lets get started
Step 1
Open a new image 600 x 250
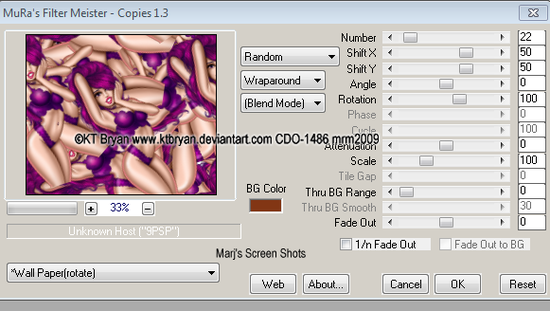
Copy and paste your tube apply MuRa's Copies Wall Paper rotate as shot one you need the image to be coverd so play around with the numbers
Step 2
Duplicate if your tube does not cover all your image, and mirror merge down,
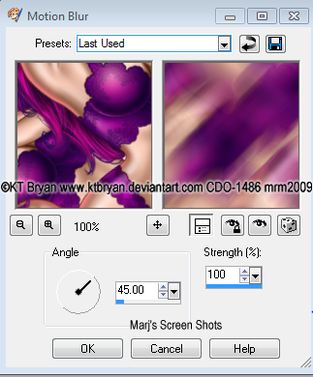
Adjust Motion Blur see shot 2
Duplicate if your tube does not cover all your image, and mirror merge down,
Adjust Motion Blur see shot 2
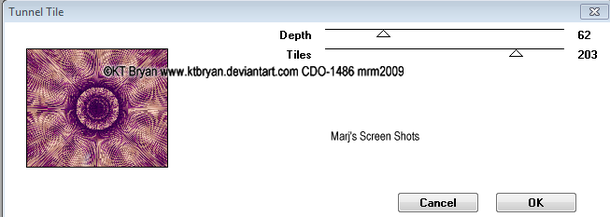
Now 10 apply Factory D Tunnel Tile shot 3
Step 3
Lower the Opacity to about 70 and duplicate, name these Bright noise 1 and 2 hide layer 2 for now
Step 4
Add a new layer and fill with a light colour I used white move down below your orinal layer,
you will see its not so harsh now.
Step 5
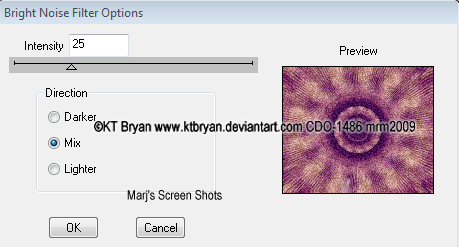
Active your bright noise 1 and apply Dsb Flux Bright Noise shot 4 hit mix once, now active Bright noise 2 and apply bright noise hitting the mix once again.
Lower the Opacity to about 70 and duplicate, name these Bright noise 1 and 2 hide layer 2 for now
Step 4
Add a new layer and fill with a light colour I used white move down below your orinal layer,
you will see its not so harsh now.
Step 5
Active your bright noise 1 and apply Dsb Flux Bright Noise shot 4 hit mix once, now active Bright noise 2 and apply bright noise hitting the mix once again.
Step 6
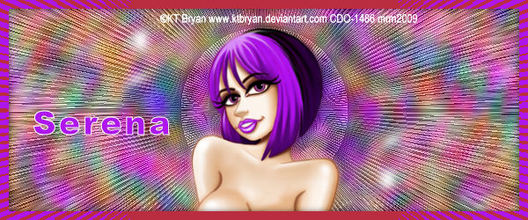
Add our tube resize if it needs it, if you do resize, remember to shappen it,
and move it to one side of your tag, I put mine on the left side,
I then added Eye Candy Impact Perpective Shadow, Blurry but this is up to you,
now crop your tag, and then shift D, put this to one side for now,
as this is what you will use for your AV
Step 7
New Raster layer fill with a dark colour from your tube, select all, modify by 4 pixels,
hit delete select none, give your frame a drop shadow I did V & H 4 Opacity 50 and blur 4,
now apply again but V & H -4
Add your copyright and name
Step 8
Open up Animation Shop, with your Bright noise 2 hidden copy merged,
and take over to AS paste as a new Animation,
back to PSP hid Bright1 and open bright noise 2 copy merged,
and paste after current frame, view and if you happy save as a GIF,
I kept the frame properties at 10.
Step 9
Open up the Dulicate tag you put to one side,
and crop the part you want to use
remember to add your copyright to your AV
as we used the tag to make the Bright Noise layers,
repeat steps 7 and 8
Hope you enjoy my tut, and would love to see your results
Marj
The 2nd set I made I used KT Bryan again but did not animated it

Written by Marj 24th March 2012
