Witching Hour
This tutorial is my own creation and any resemblance to any other tutorial,
is purely coincidental.
Please do not copy as use as your own work if,
you wish to translate please email me
It’s assumed that you have working knowledge on how to use filters/plugins.
This tutorial is written using PSP 9 but it can also be done in other versions
Animation Shop I will refer to this as AS
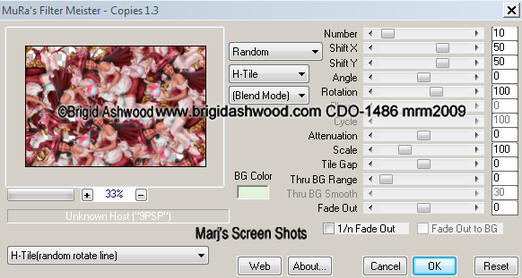
Filter MuRa's Meister Copies
Filter Alien Skin Xenofex Constellation
Tube of choice- I using the work of Brigid Ashwood you get her work here
http://www.cdoestore.com/
Mask by Narah I used nn_140712_mask_121 sorry I can not share, but you get her masks at her site
Drop Shadow I used was H & V 4 Opacity 50 Blur 5
Font of choice I used Zamrud & Khatulistiwa
Lets begin
Remember to save often NOTE If you do not want to make the tag,
use a transparent image of 600 X 300 or 250
Step 1.
Open a image 600 x 400 fill with a colour from your tube
I used #c89c94, name this background,
copy and paste your tube as a new layer, I re-sized mine by 80% ,
apply MuRa's Meister Copies H-Tile (random rotate line)
with the settings in shot one
Step 2
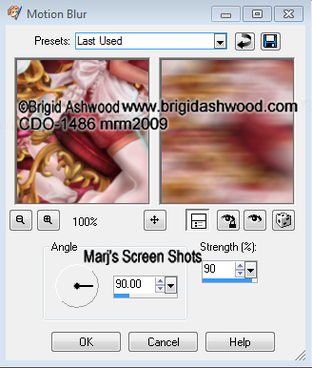
Still working on this layer apply Adjust Motion Blur see shot two,
Still working on this layer apply Adjust Motion Blur see shot two,
Still working on this layer duplicate mirror and flip,
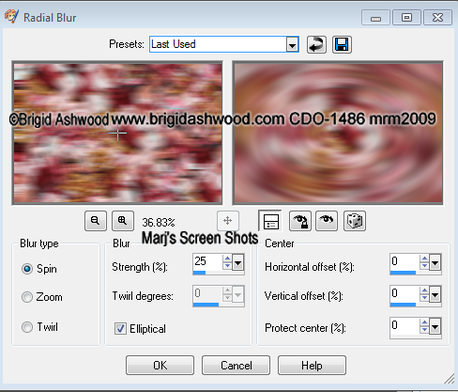
merge visible, apply Adjust Radial Blue see shot 3,
merge visible, apply Adjust Radial Blue see shot 3,
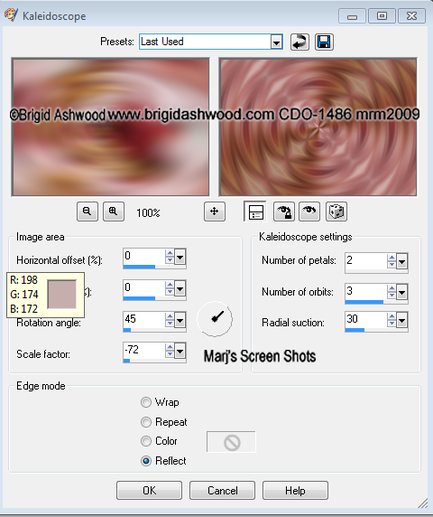
Still working on this layer apply Effects Refection Kaleidoscope see shot 4.
name this Kaleidoscope
name this Kaleidoscope
Step 2
With your mask layer active apply your mask, merge group,
apply a drop shadow, H & V 4 Opacity 50 Blur 5, apply again but H & V -4,
this will make your mask layer stand out,
take your magic wand and click inside the mask, invert,
copy and paste your tube re-size by 80% hit delete,
copy and paste your tube as a new image mirror,
re-size by 80% copy and paste as a new layer,
postion where you like, hit delete select none,
play around with your blend modes on one I did Luminacc (L)
and the other Screen,
copy and paste your tube DO not resize and place in the middle of your image,
do the same drop shadow as before
Shift D twice this is for your fourm tag and AV, put this image to one side
Step 3
New layer fill with a dark colour from your tube,
Select all Modify, Contact by 8 hit delete select none,
again add the same drop shadows as before,
we are going to make the saying a bit different,
write what you want I first did Witching,
DO not convert to raster layer, in your layers click on the text,
and a menu will appear apply Convert text to curves,
and then Convert text to Character Shape and move each letter where you want,
see my tag for ref: I then did Hour repeat with your next word,
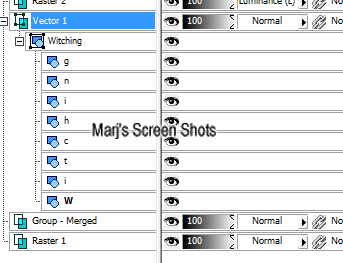
merge your two text layers, give this a drop shadow as above,
your layer pallet should be as shot 5
With your mask layer active apply your mask, merge group,
apply a drop shadow, H & V 4 Opacity 50 Blur 5, apply again but H & V -4,
this will make your mask layer stand out,
take your magic wand and click inside the mask, invert,
copy and paste your tube re-size by 80% hit delete,
copy and paste your tube as a new image mirror,
re-size by 80% copy and paste as a new layer,
postion where you like, hit delete select none,
play around with your blend modes on one I did Luminacc (L)
and the other Screen,
copy and paste your tube DO not resize and place in the middle of your image,
do the same drop shadow as before
Shift D twice this is for your fourm tag and AV, put this image to one side
Step 3
New layer fill with a dark colour from your tube,
Select all Modify, Contact by 8 hit delete select none,
again add the same drop shadows as before,
we are going to make the saying a bit different,
write what you want I first did Witching,
DO not convert to raster layer, in your layers click on the text,
and a menu will appear apply Convert text to curves,
and then Convert text to Character Shape and move each letter where you want,
see my tag for ref: I then did Hour repeat with your next word,
merge your two text layers, give this a drop shadow as above,
your layer pallet should be as shot 5
Add your copyright and name
Open up AS
Step 4
Active the background layer,
and apply Alien Skin Xenofex Constellation, Star size 0.85 Size Variation,
and Edge Star Density 50, Overall Star Density 25, Overdrive 50, Twinkle Amount 75,
and Twinkle Rotation 45, hit OK copy merged,
and take to AS paste as a new image,
back to PSP undo the Constellation and redo but hit random,
take over to AS and paste after current frame, when happy save as GIF
Step 5
Open up one of your images and crop it 600 X 300.
See my tag for ref and repeat steps 3 and 4,
For your AV crop the 2nd image to 150 X 150 make a border,
and your name remember if you use any part of your tube to add your copyright
Hope you enjoy my tutorial, and problems please feel free to email me at [email protected] please remember this is just a guide,
I would love to see any work you have made using my Tutorials
Marj
Written 21st August 2013
