Fairies Wear Boots
My Section HERE
This tutorial is my own creation and any resemblance to any other tutorial, is purely coincidental.
Please do not copy and use as your own work.
If you wish to translate please email me
It’s assumed that you have working knowledge on how to use filters/plugins.
Filter Unlimited 2.0
Filter Alien Skin Xenofex 2 Constellation
This tutorial is written using P.S.P. 16 but it can also be done in other versions
Animation Shop I will Ref to this as A.S
Tube of choice- I used Anna Rigby you can get her work here
http://www.annarigby.com
Font of choice I used Fairies Wear Boots
Drop Shadow V & H 4 Opacity 40 Bur 5
Please remember to Adjust and Sharpen your Tube if you resize
Remember to save often
Step 1
Open a new image 475 X 465.
New layer fill with a gradient using two colours from your tube, duplicate
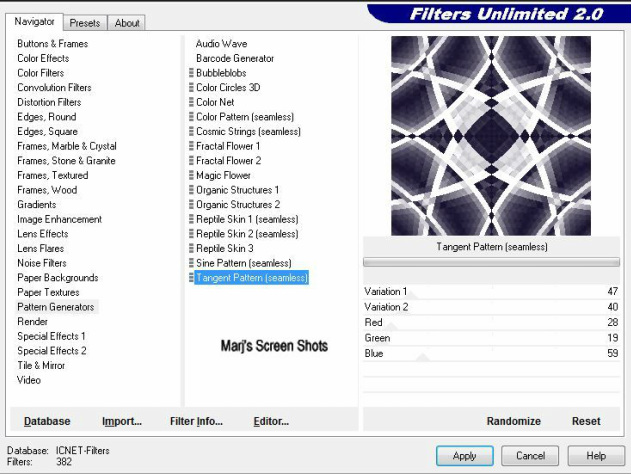
Working on the duplicate layer Unlimited 2.0 Pattern Generators Tangent Pattern see shot 1.
Mode Luminace ( L ) and lower the mode to 44 merge down, name this background
New layer fill with a light colour from your tube, I used #ffc5ee
Find my section, hit delete. Select none
Shot 1
This tutorial is my own creation and any resemblance to any other tutorial, is purely coincidental.
Please do not copy and use as your own work.
If you wish to translate please email me
It’s assumed that you have working knowledge on how to use filters/plugins.
Filter Unlimited 2.0
Filter Alien Skin Xenofex 2 Constellation
This tutorial is written using P.S.P. 16 but it can also be done in other versions
Animation Shop I will Ref to this as A.S
Tube of choice- I used Anna Rigby you can get her work here
http://www.annarigby.com
Font of choice I used Fairies Wear Boots
Drop Shadow V & H 4 Opacity 40 Bur 5
Please remember to Adjust and Sharpen your Tube if you resize
Remember to save often
Step 1
Open a new image 475 X 465.
New layer fill with a gradient using two colours from your tube, duplicate
Working on the duplicate layer Unlimited 2.0 Pattern Generators Tangent Pattern see shot 1.
Mode Luminace ( L ) and lower the mode to 44 merge down, name this background
New layer fill with a light colour from your tube, I used #ffc5ee
Find my section, hit delete. Select none
Shot 1
Step 2
Copy and paste your tube re-size if necessary.
Move to the right hand side, give it a drop shadow.
Add your Artist copyright, your name and a saying or use the one I did.
Give your name and saying a drop shadow.
New raster layer fill with the same light colour you used earlier.
Select all Modify Contact by 6 hit delete
Step 3
Active your background layer.
Alien Skin Xenofex 2 Constellation, settings shot 2
Copy merge and take over to A.S.
Paste as a new image, back to P.S.P. Undo Constellation,
Redo Constellation, hit the Random button, copy merge and take over to A.S.
Paste after current frame, I set the frames at 30.
Save as a G.I.F.
Shot 2

Hope you enjoy my tutorial.
Any problems please feel free to email me at [email protected]
Please remember this is just a guide.
I would love to see any work you have made using my tutorials
And with your permission show them on my site
Marj
Written 19th August 2014
Any problems please feel free to email me at [email protected]
Please remember this is just a guide.
I would love to see any work you have made using my tutorials
And with your permission show them on my site
Marj
Written 19th August 2014
