Birth of a Dragon
This tutorial is my own creation and any resemblance to any other tutorial,
is purely coincidental.
Please do not copy as use as your own work, and do not translate
without my permission
This tutorial is written using PSP 9 but it can also be done in other versions
Animation Shop
Tube of choice- I using the work of Anne Stokes you can find her work at
www.annestokes.com
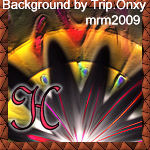
Background of choice
I used one from a friend of mine who gave me permission to use his work
Font of choice I used Fargang_ttf for my saying, and French Script for the name
Animation of choice I used Aura_bymissy
Step 1
Open up a image
600 x 400, select all, copy and paste into section your background, deselect,
duplicate, keep this layer active and apply screen, Effect Enhance.
Step 2
Copy and paste
your tube, and resize if necessary place this on which side looks best, for your
background, I put mine on the right hand side. Duplicate and Adjust Gassian Blur
3, apply screen to this layer, do shift and D twice this if for your Forum Set
and AV
Step 3
New raster layer
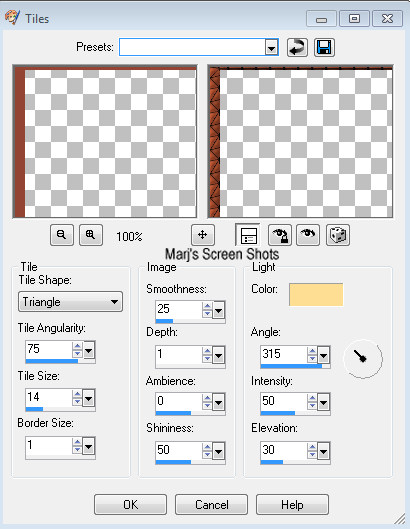
fill with a colour form your tube, I use one from the dragon, select all modify,
contact by 6 delete deselect, still on this layer apply Effects Tiles and use
the skin effect. shot 1
is purely coincidental.
Please do not copy as use as your own work, and do not translate
without my permission
This tutorial is written using PSP 9 but it can also be done in other versions
Animation Shop
Tube of choice- I using the work of Anne Stokes you can find her work at
www.annestokes.com
Background of choice
I used one from a friend of mine who gave me permission to use his work
Font of choice I used Fargang_ttf for my saying, and French Script for the name
Animation of choice I used Aura_bymissy
Step 1
Open up a image
600 x 400, select all, copy and paste into section your background, deselect,
duplicate, keep this layer active and apply screen, Effect Enhance.
Step 2
Copy and paste
your tube, and resize if necessary place this on which side looks best, for your
background, I put mine on the right hand side. Duplicate and Adjust Gassian Blur
3, apply screen to this layer, do shift and D twice this if for your Forum Set
and AV
Step 3
New raster layer
fill with a colour form your tube, I use one from the dragon, select all modify,
contact by 6 delete deselect, still on this layer apply Effects Tiles and use
the skin effect. shot 1
still on this layer Effects Enhance.
Step 4
Add copyright, name and saying
Step 5
Close all layers
apart for your two background layers copy merge,
and take over to Animation shop,open the animation
you are going to use and make the same number of frames of your back ground
mine was 10 frames,
Edit and Propagate on your background frames and same with your animation
and paste the animation on to the background frames.
Step 6
Back to PSP close off the background layers and open the rest,
copy merged and paste take to AS and make the same amount of frames,
and repeat the Edit and Propagate step.
View and if happy save, I left the speed at 10.
Step 7
Back to PSP, open up one of the images you set aside earlier,
take your crop tool and crop it to 600 x 400, on the partof tag you want,
and repeat steps 3 to 6
Step 8
Now open the other image you put to one side,
and crop the part, which you want to use, to 150 x 150,
I did not animated the AV as it did not need it, remember to add any
copright
Hope you enjoyed my new Tut
Marj
Written
4th July 2012
