Bildstanze
This tutorial is my own creation and any resemblance to any other tutorial, is purely coincidental.
Please do not copy and use as your own work.
If you wish to translate please email me
It’s assumed that you have working knowledge on how to use filters/plugins.
Filter Kiwi's Oelfilter
Filter AA Foto Frame
Filter DBS Flux
This tutorial is written using PSP 16 but it can also be done in other versions
Animation Shop I will Ref to this as AS
Tube of choice- I used Alehandra Vanhek you can get her fabulous work here http://picsfordesign.com/en/
Font of choice I used Brock Script
Drop Shadow V & H 4 Opacity 40 Bur 5
Please remember to Adjust and Sharpen your Tube if you resize
Remember to save often
Step 1
Open a new image 600 X 300, fill with a light colour from your tube.
I used #f7f1e3, copy and paste your tube, put it on left had side of image
Resize it and crop your image, Duplicate, and mirror.
Working on the original, apply Kiwi's Oelfilter Birdstanze setting as shot one.
Shot 1
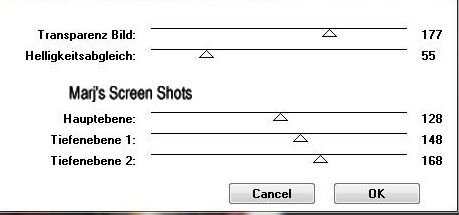
Mode Luminance ( L )
Apply Filter AA Foto Frame, change the width no to 15.
Step 2
Still working on the original.
Take your section tool set at Rectangle, and go round the tube.
See my image for ref, promote section to layer, select none.
Apply drop shadow, V & H 4 Opacity 40 Bur 5 apply again but make V & H -4.
Step 3
Active the duplicate Tube, take your section tool again set at Circle.
This time and go round any of the pearls on her dress, promote section to layer, select none.
I want a few pearls so duplicate this layer twice, close off back ground.
Merge down repeat so you have one layer name this Pearls close the pearls off.
I did the same with the stars, merge down
open up the Pearl layer and merge down.
Step 4
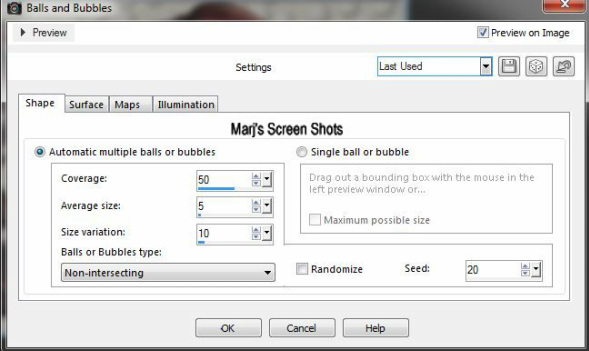
Active your back ground layer, Effects Artistic Balls and Bubbles, setting as shot 2.
Shot 2
Apply Filter AA Foto Frame, change the width no to 15.
Step 2
Still working on the original.
Take your section tool set at Rectangle, and go round the tube.
See my image for ref, promote section to layer, select none.
Apply drop shadow, V & H 4 Opacity 40 Bur 5 apply again but make V & H -4.
Step 3
Active the duplicate Tube, take your section tool again set at Circle.
This time and go round any of the pearls on her dress, promote section to layer, select none.
I want a few pearls so duplicate this layer twice, close off back ground.
Merge down repeat so you have one layer name this Pearls close the pearls off.
I did the same with the stars, merge down
open up the Pearl layer and merge down.
Step 4
Active your back ground layer, Effects Artistic Balls and Bubbles, setting as shot 2.
Shot 2
Shift D this is for your AV if you want one, put to one side for now
Add your Artists copyright and your name, give your name the same drop shadow.
Step 5
Active the pearl layer and apply DBS Flux Bright Noise, Intensity 50.
Copy merge and take over to A.S.
Paste as a new image, back to P.S.P. Undo Flux Bright Noise.
And hit the mix button twice, copy merge and take over to A.S.
Paste after current frame
Step 6
Active the image you put to one side and crop 150 X 150.
IF you use any part of your tube, remember to add your Artists copyright
Hope you enjoy my tutorial.
Any problems please feel free to email me at [email protected]
Please remember this is just a guide.
I would love to see any work you have made using my tutorials
And with your permission show them on my site
Marj
Written 5th August 2014
