Love Balls
This tutorial is my own creation and any resemblance to any other tutorial, is purely coincidental.
Please do not copy as use as your own work
This tutorial is written using PSP 9 but it can also be done in other versions
Animation Shop
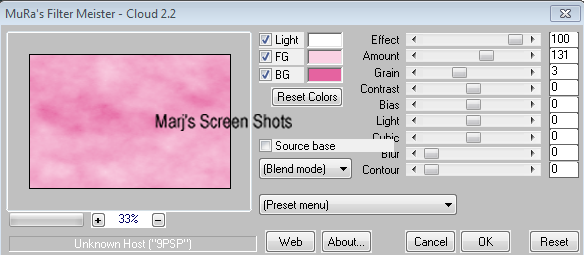
Filter Mura's Meister Cloud
Filter Eye Candy Impact Perspective Shadow and Glass
Tube of choice you need a close up and normal size,
I used Elias Chatzoudis, I brought mine when he was with MPT, this is now closed
But you can get his work here at his own site
www.Elias-Design.gr
Mask of choice or you can use mine
http://pspbymarj.weebly.com/masks.html
open your mask up in PSP
Drop Shadow I used was H & V 4 Opacity 40 Blur 4
Font of choice I used Helena-Bold
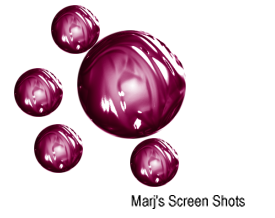
I have also put the ball image I made at bottom of my tut
Lets begin
Foreground colour # fad1e3 background #fad1e3 Remember to save often
Step 1
Open image 600 X 400 apply Mura's Meister Cloud, see shot 1, close this layer off for now
Please do not copy as use as your own work
This tutorial is written using PSP 9 but it can also be done in other versions
Animation Shop
Filter Mura's Meister Cloud
Filter Eye Candy Impact Perspective Shadow and Glass
Tube of choice you need a close up and normal size,
I used Elias Chatzoudis, I brought mine when he was with MPT, this is now closed
But you can get his work here at his own site
www.Elias-Design.gr
Mask of choice or you can use mine
http://pspbymarj.weebly.com/masks.html
open your mask up in PSP
Drop Shadow I used was H & V 4 Opacity 40 Blur 4
Font of choice I used Helena-Bold
I have also put the ball image I made at bottom of my tut
Lets begin
Foreground colour # fad1e3 background #fad1e3 Remember to save often
Step 1
Open image 600 X 400 apply Mura's Meister Cloud, see shot 1, close this layer off for now
New raster layer select all, copy and paste your close up into section deselect,
still working on this layer apply Effects Reflection Patten, see shot 2,
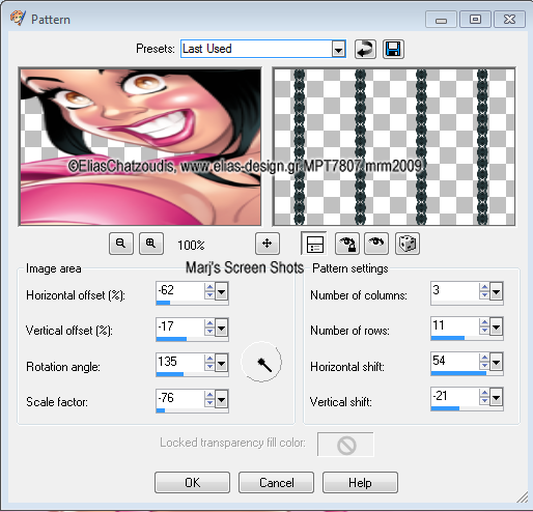
go to your layer pallet and apply soft light, duplicate,
apply Effects Geometric Circle Transparent checked,
go to layer palette set this layer to overlay, active the original layer
and set the opacity to about 72. and close it off
apply Effects Geometric Circle Transparent checked,
go to layer palette set this layer to overlay, active the original layer
and set the opacity to about 72. and close it off
Step 2
Back to your ball you have made, resize by 50% and move it to one side of your image see my tag,
duplicate and mirror, I made four of this size, then made three more and resized them by 70%,
with your other two layers closed merge visible, if you want to colourise it do it at this stage,
I did Adjust and Colour Balance and picked a colour from my Tube,
and applied multiply but I leave this up to you, name this layer Ball
Step 3
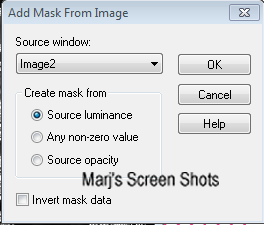
Activate your bottom layer and add a new raster layer fill this with white,
find the mask you are using and apply. with thses settings
Shot 3
Back to your ball you have made, resize by 50% and move it to one side of your image see my tag,
duplicate and mirror, I made four of this size, then made three more and resized them by 70%,
with your other two layers closed merge visible, if you want to colourise it do it at this stage,
I did Adjust and Colour Balance and picked a colour from my Tube,
and applied multiply but I leave this up to you, name this layer Ball
Step 3
Activate your bottom layer and add a new raster layer fill this with white,
find the mask you are using and apply. with thses settings
Shot 3
Step 4
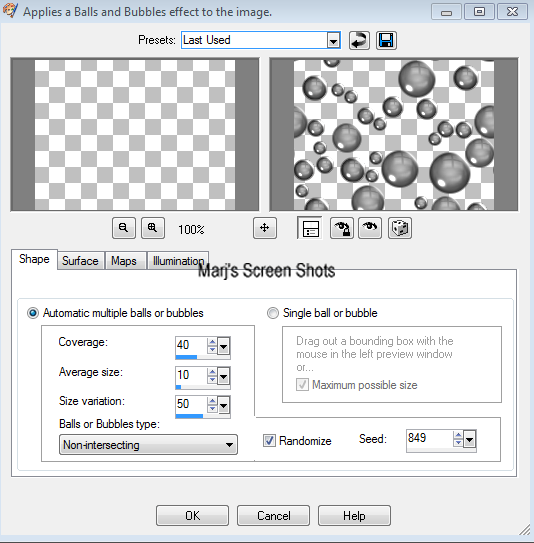
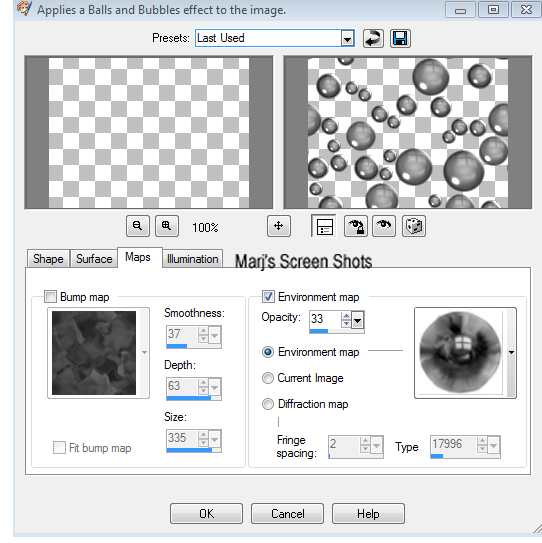
This next step you can miss if you wish, open up a image 200x 200
and apply Effects Artistic effects bubbles, see shot 3 and 4,
you can have fun now as there are so many effects to chose from,
I used Motion Dance,if you wish to colourise do so,
now open new image 400 x 400, copy and paste your ball on to it,
you can delete oringal ball you made now, resize by 55% ,
duplicate this resize by 45% duplicate three more times
and place the around the bigger ball,
when happy with placement merge viable,
see my tag I have put the ball image I made at bottom of tut if you wish to use it
|
|
Shot 4 and 5
Step 5
Open up your main image, activate your top layer,
copy and paste your ball image, I resized mine by 75%,
and place where you would like, see my tag,
I duplicated this three times, and resized a few,
and then placed them around the ball,'s
using your deform tool move them around to where you think they look best.
Step 6
Copy and paste your main tube resize if its needs it and Adjust and Sharpen. give it a drop shadow
or use as I did Eye Candy again with the same settings as before
Step 7
At this point do Shift D twice this is for your forum set and AV put to one side for now
Step 8
New Raster layer fill with your dark colour, Select all, Modify, Contact by 6 pixels, hit delete,
Apply Eye Candy Impact Glass Clear,
I gave this a Drop Shadow H & V 2 Opacity 40 Blur 4 then did it again but V & H -2
Add your copyright and name, and a saying if you wish
give your name and saying a small drop shadow I used the one I did for the tube.
Step 9
Open up Animation Shop, activate your Ball layer and
apply Adjust noise Random Monochrome ticked noise 40, take over to AS, and paste as a new animation,
back to PSP, use you edit bottom and undo the noise, now apply again clicking on random twice,
take over to AS and paste after current frame,
repeat the above step again, view and if happy save as a GIF, leave the animation at 10
Step 10
Open one of the images you put to one side and do a section see shot 6,
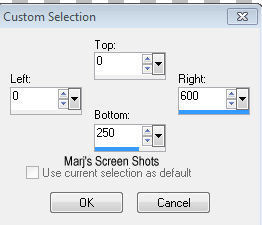
Image crop to section, now repeat step 8 and 9
Step 11
Open your other image and crop to 150 x 150, repeat steps 8 and 9.
PLEASE remember if you use any part of your tube you must add your copyright
Hope you enjoyed my tut would love to see your results
Marj
Written in 25th April 2012
Ball image
Step 11
Open your other image and crop to 150 x 150, repeat steps 8 and 9.
PLEASE remember if you use any part of your tube you must add your copyright
Hope you enjoyed my tut would love to see your results
Marj
Written in 25th April 2012
Ball image
This is my friends take on this tut great one hon many thanks
