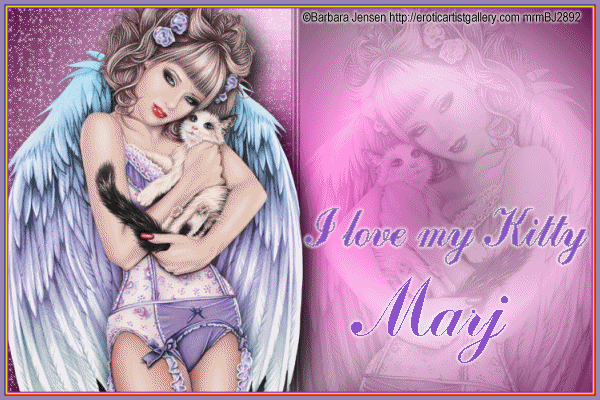
I love my Kitty

This tutorial is written using PSP 9 but it can also be done in other versions.
This tutorial is my own creation and any resemblance to any other tutorial, is purely coincidental.
Please do not copy and use as your own
What we will need for this tutorial:-
Paint Shop Pro (PSP) any version, and Animation shop
Filter Alien Skin Xenofex 2 Constellation
Filter Eye Candy 400 Gradient Glow
Filter Eye Candy 5 Impact Perspective Shadow
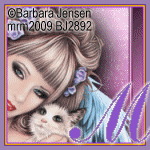
Tube of choice- I using the great work of Barbara Jensen
Please do not use unless you have a license this can be purchased at her site
Here http://www.barbarajensentubes.com/
Font of choice I used ArtScript_Regular
Remember to save as you go along
We are going to make the main tag first, and will use this for the forum and AV tags
Lets get started, make a gradient with two colours from your tube Sunburst Angel and Repeats 0
Step 1
Open a new image 600 x 400
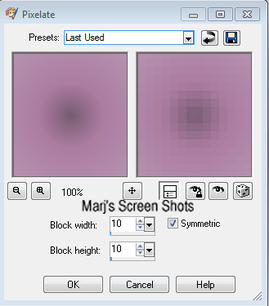
Fill with your gradient, name this background duplicate, go to Effects Distortion Pixelate.
Shot 1
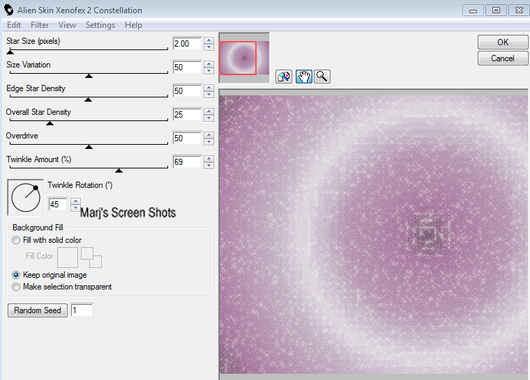
Name this layer Constellation 1, duplicate twice name them Constellation 2 and 3,
now working on the original layer, apply Alien Skin Xenofex 2 Constellation,
shot 2, then active the other two layer and hit the random button once,
hide your layers 2 and 3 for now
now working on the original layer, apply Alien Skin Xenofex 2 Constellation,
shot 2, then active the other two layer and hit the random button once,
hide your layers 2 and 3 for now
Step 2
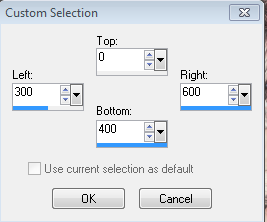
Take your Selection tool and make a selection as shot 3
Take your Selection tool and make a selection as shot 3
Now active Constellation 1 and hit delete, do the same with
Constellation 2 and 3 deselect
Step 3
Add a new raster layer, take your Selection tool and make the same selection, as shot 3
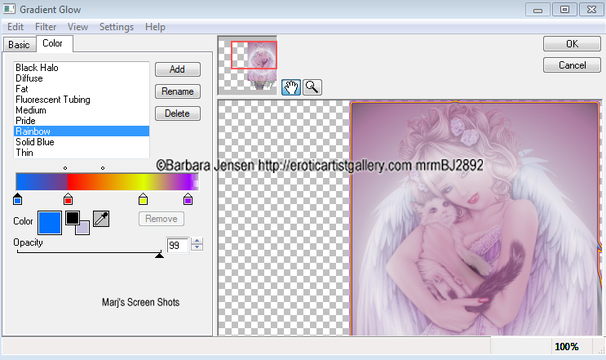
Promote to layer, and fill with your gradient, paste your tube, and image mirror, resize if it needs it, active your promoted layer and invert, active your tube hit delete, now apply Soft Light, active your promoted layer and lower the opacity down to 60, or what you feel happy with, active your tube and merge down, and give this layer a Gradient Glow, shot 4
Constellation 2 and 3 deselect
Step 3
Add a new raster layer, take your Selection tool and make the same selection, as shot 3
Promote to layer, and fill with your gradient, paste your tube, and image mirror, resize if it needs it, active your promoted layer and invert, active your tube hit delete, now apply Soft Light, active your promoted layer and lower the opacity down to 60, or what you feel happy with, active your tube and merge down, and give this layer a Gradient Glow, shot 4
Step 4
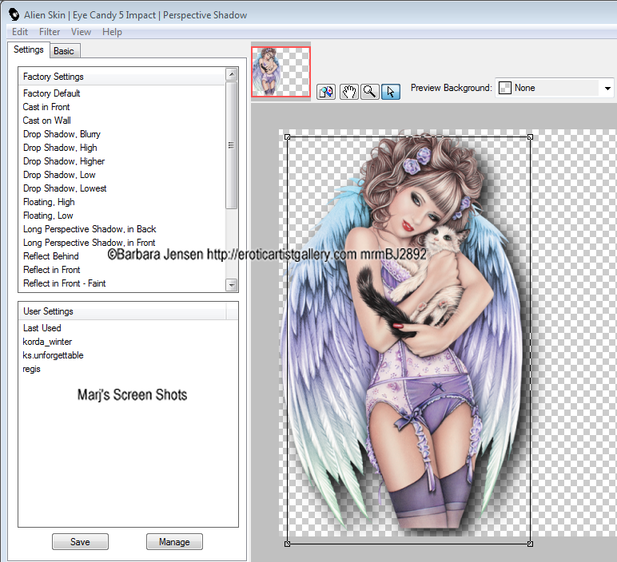
Add your tube again and put it to the left hand side, give it a blurry drop shadow.
I used Eye Candy 5 Impact Perspective Shadow shot 5
Add your tube again and put it to the left hand side, give it a blurry drop shadow.
I used Eye Candy 5 Impact Perspective Shadow shot 5
Step 5
Do Shift and D twice and put these two images to one side for now
Step 6
New raster layer flood fill with the dark colour and Sections All, Modify, Contact by 4 pixels hit OK delete select none, apply Gradient Glow, same as before
Step 7
Add your copyright and name, I also added a saying and gave it a Gradient Glow, thin white
Step 8
Open up Animation Shop
With constellation 2 and 3 hidden copy merge and take over to AS, paste as a new Animation,
back to PSP, hide constellation 1 and unhide 2 copy merge
and take to AS and paste after current frame, back to PSP
now do the same with constellation 3, select all an do frame properties at 20
View and if happy say as GIF
Step 9
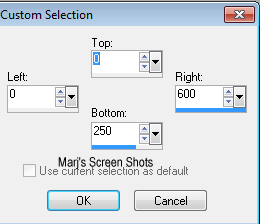
Open up one of the images you put to one side do a section, Shot 6
then Image crop to Section.
Deselect and repeat step 6
Do Shift and D twice and put these two images to one side for now
Step 6
New raster layer flood fill with the dark colour and Sections All, Modify, Contact by 4 pixels hit OK delete select none, apply Gradient Glow, same as before
Step 7
Add your copyright and name, I also added a saying and gave it a Gradient Glow, thin white
Step 8
Open up Animation Shop
With constellation 2 and 3 hidden copy merge and take over to AS, paste as a new Animation,
back to PSP, hide constellation 1 and unhide 2 copy merge
and take to AS and paste after current frame, back to PSP
now do the same with constellation 3, select all an do frame properties at 20
View and if happy say as GIF
Step 9
Open up one of the images you put to one side do a section, Shot 6
then Image crop to Section.
Deselect and repeat step 6
Step 9
Crop the piece of tag you want to use 150 x 150 pixel and repeat step 6.
Remember if you use any of the tube to add the Artist copyright
Hope you enjoy my tut.
Marj
Written by Marj 27th March 2012
Crop the piece of tag you want to use 150 x 150 pixel and repeat step 6.
Remember if you use any of the tube to add the Artist copyright
Hope you enjoy my tut.
Marj
Written by Marj 27th March 2012
